
I’m working on one of my treasure hunts (Caesar, Book, Ottendorf) and I’m trying to figure out how to take things to the next level.
If you haven’t figured this out about me yet, I like to be a little extra. It’s not enough to do a simple activity with my kids, but I want them to suspend reality for a little bit and give them a small sense of fantasy.
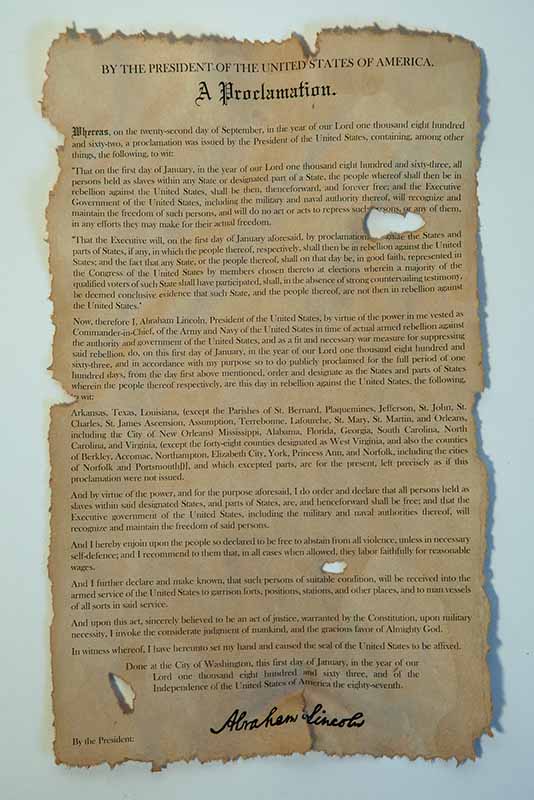
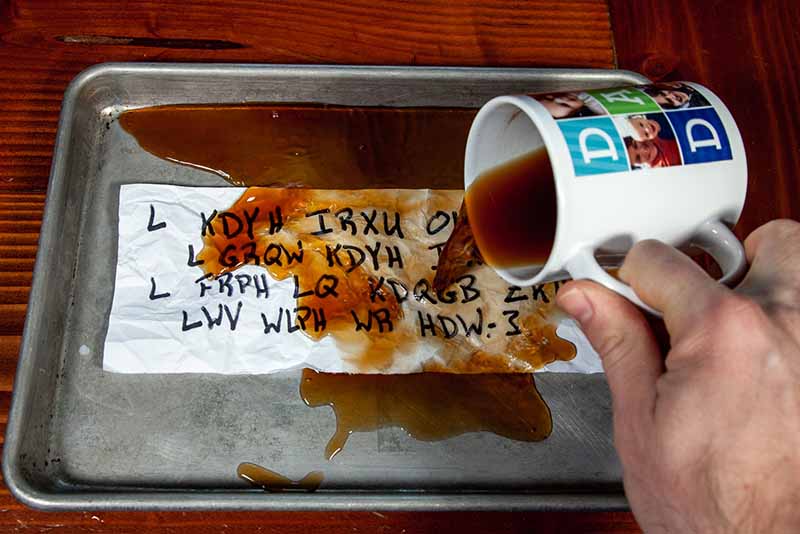
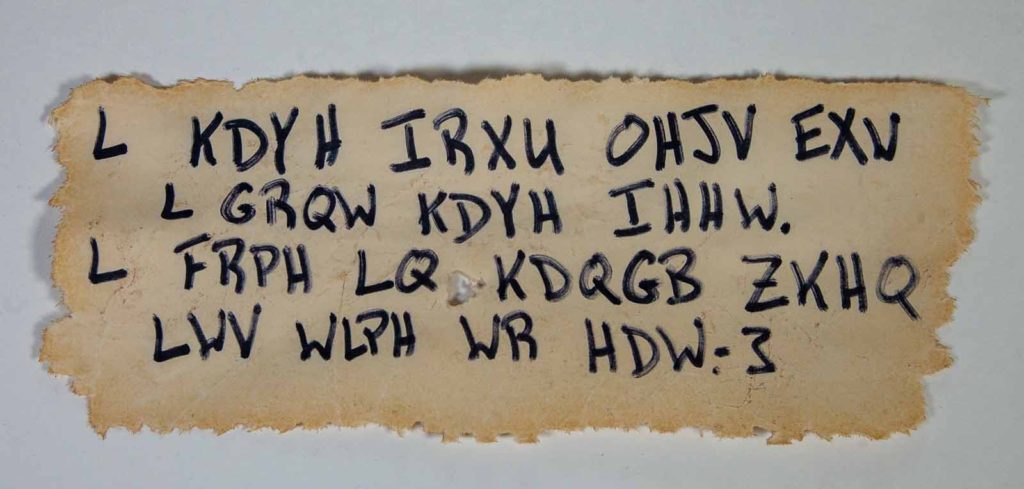
So when I show my kids a framed document that has a secret Ottendorf cipher on the back (include hyperlink), I want that paper to look old. I want my kids to think they discovered something that could have been made hundreds of years ago.
Thus began my rabbit hole on how to weather paper and age it so it looks like an antique piece of parchment.
- How to Make Paper Look Old
- Step By Step Instructions to Age Paper
- Paper Selection: What kind of paper should I use when making paper look old?
- Preparing the Paper: Should I draw on my paper before or after staining it?
- Distressing the Edges of the Paper
- Preparing the Paper: To crumple or not to crumple
- Staining the Paper: Coffee or Tea?
- How to Stain Paper with Coffee and Tea
- Drying the Paper: Heating vs Air Drying
- The Super Short Method: The easiest way to make paper look old
- Which Method Do I Pick? My preferred step by step approach to make paper look old.
How to Make Paper Look Old
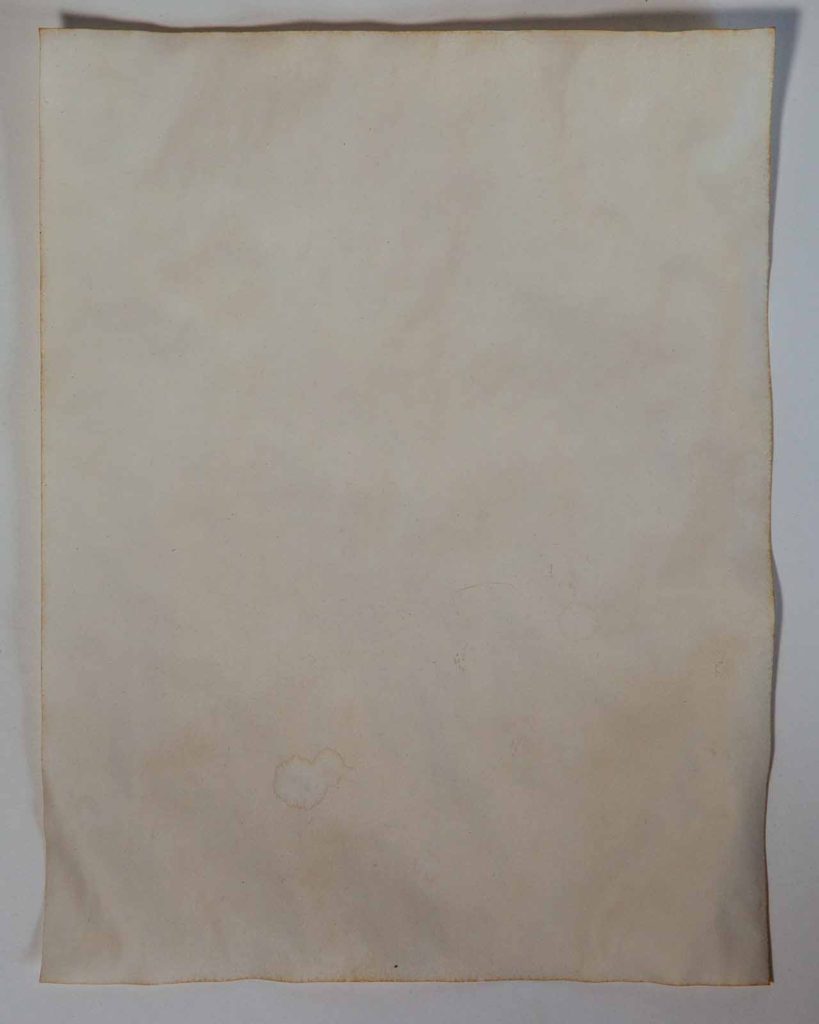
The process of making paper look old is quite simple. Gently tear the edges of your paper, crumple it into a ball, and carefully smooth it out. Soak the paper in some coffee or tea for a couple seconds and let it dry.
There are a number of variations you can use to age your paper, all giving slightly different results. You might be asking, which way is best? The answer: it depends. It depends on what kind of look you’re going for and how old and distressed you want your paper to be.
The good news is I’ve already done the homework for you. I’ve explored lots of ways of weathering paper and included lots of pictures. Let’s explore the options and see which works best for different situations.
Step By Step Instructions to Age Paper
Paper Selection: What kind of paper should I use when making paper look old?
There are many kinds of paper available today of different kinds of weights and thicknesses. Interestingly, for the process of making paper look weathered and old, basic printer paper works surprisingly well.
When I first explored different options for aging paper, I was convinced I was going to need some heavy weight paper. But after using thick water color paper, medium weight paper from a sketch pad, and then simple printer paper, I was surprised with how well the printer paper worked.
Because the paper gets soaked in coffee or tea, the fibers swell and then dry. This takes the smooth finish of printer paper and gives it texture. The results are so good, you’ll have no idea it was printer paper.
The added benefit of using printer paper is that it easily fits in the printer (I know, I’m so smart…). I’m no artist so I like to use the printer to print images or texts. Most paper from sketch pads and water color pads are slightly oversized, just enough so that it does not fit in many average printers.
That being said, if you want to use something much bigger, by all means, use whatever paper your want. If you want a larger treasure map, then use larger paper. Thicker paper will weather just as well.
Because you will be soaking the paper in coffee or tea, the paper can be quite delicate when wet, so there is an added advantage to using a thicker paper, especially when it is an oversized piece.
Anything that is the thickness of cardstock or thicker, however, is too thick to be practical. A good rule of thumb is to pick paper that you can easily crumple by hand.
Preparing the Paper: Should I draw on my paper before or after staining it?
Before doing any weathering or aging to your paper, print and/or draw everything you want on it. In my experience, inkjet, laser, and Sharpie have not bled when I soaked the paper in coffee or tea.
If you plan to draw using markers whose finish is questionable, test it on a piece of scrap paper. Simply draw something on the kind of paper you plan to use, get it wet, and see if the ink bleeds.
I personally like the idea that when I’m weathering a document, I’m weathering the paper as well as the message. It’s also a lot easier to run a clean piece of paper through a printer than one that’s been crumped up and soaked in coffee.
Distressing the Edges of the Paper
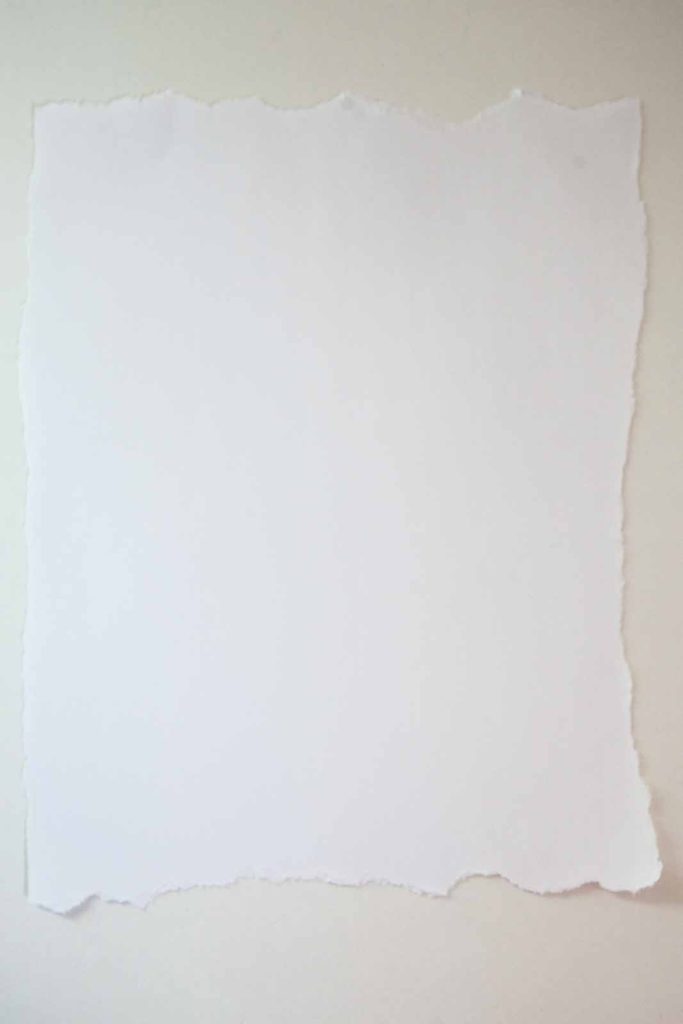
There are three ways to prepare the edges of the paper to make it look aged: two you do before you stain the paper, and one you do after.
The first and simplest is to lightly tear the edges. This looks really good when you’re making a treasure map or something pirate-like, something that would have gotten pretty beat up and used a lot.
The next way involves using fire. Please use caution as you are burning paper. It’s probably not the smartest thing to do inside your living room over carpet.
I recommend doing this over your kitchen sink, in a garage, or outside where you can safely drop it if things get carried away. Also, have either a bucket of water, or better, a fire extinguisher handy.
Start by using a lighter or a candle and lightly singe the edges of the paper. Quickly blow out any flare ups and tap away any hot embers before it burns too much of the paper.
You can flake away any bits that are a little too singed. Overall, the burning gives the edges a more organic look and the edges have a little color.
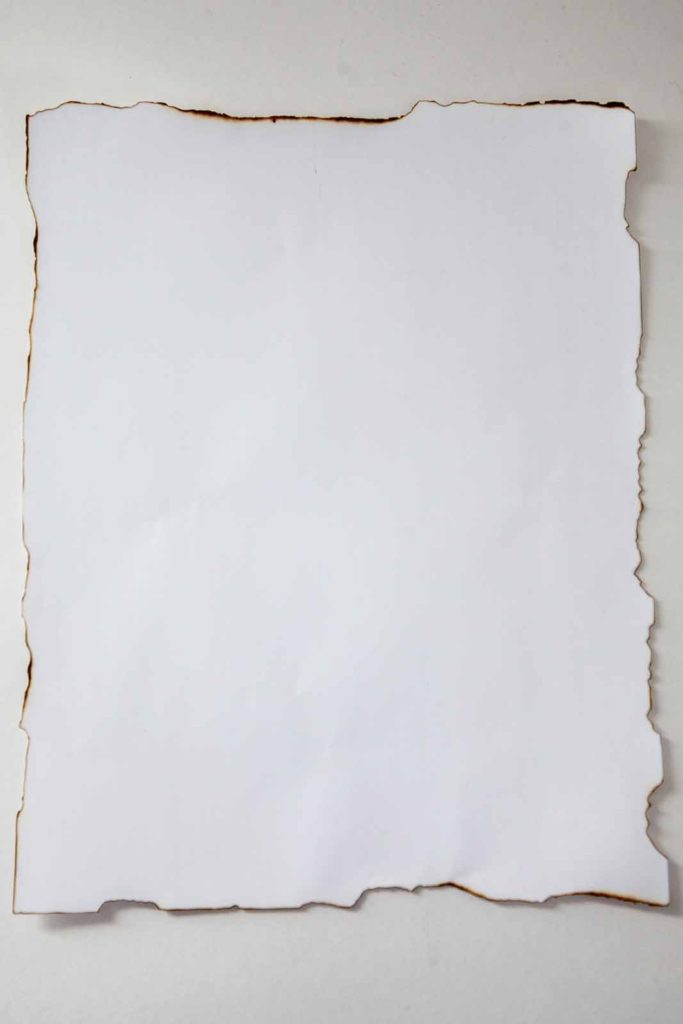
Generally, the flame to the edge of the paper is not my favorite option. Not only am I not thrilled about playing with fire, I’m not a big fan of the look. But it is a common approach to aging paper, and if this is a look you want, then by all means, go for it.
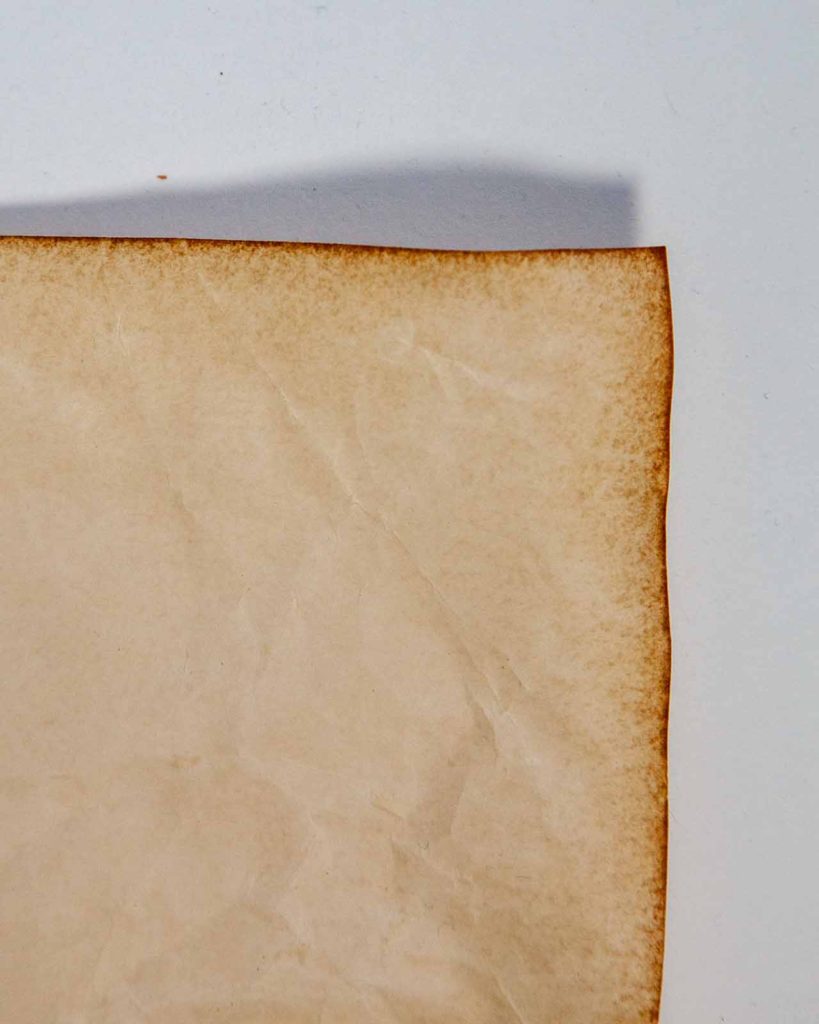
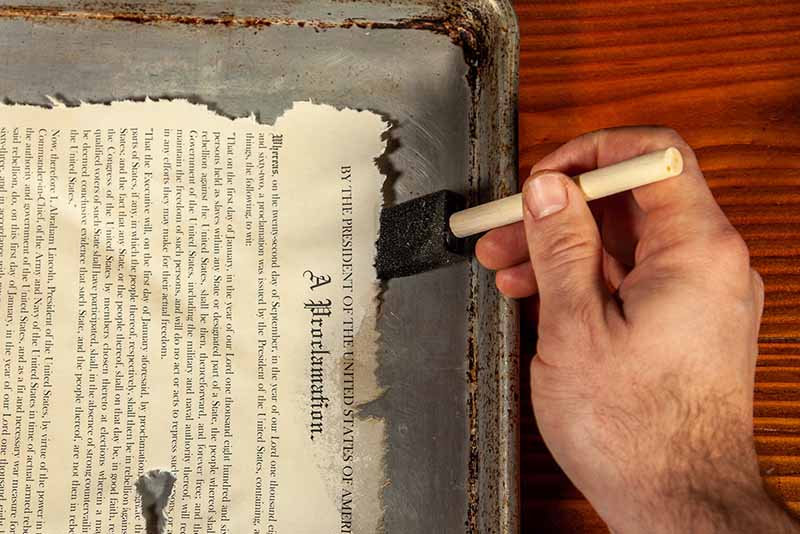
The third way to weather the edges of your paper (and this is quickly becoming my favorite way), is done after you stain your paper. When the paper is still wet, take a bamboo skewer (I’m using a metal one in the picture. Both work.), and press the sharp end on the edge of the paper. Using a flicking motion, flick off pieces of the edge to tear pieces away from the paper.
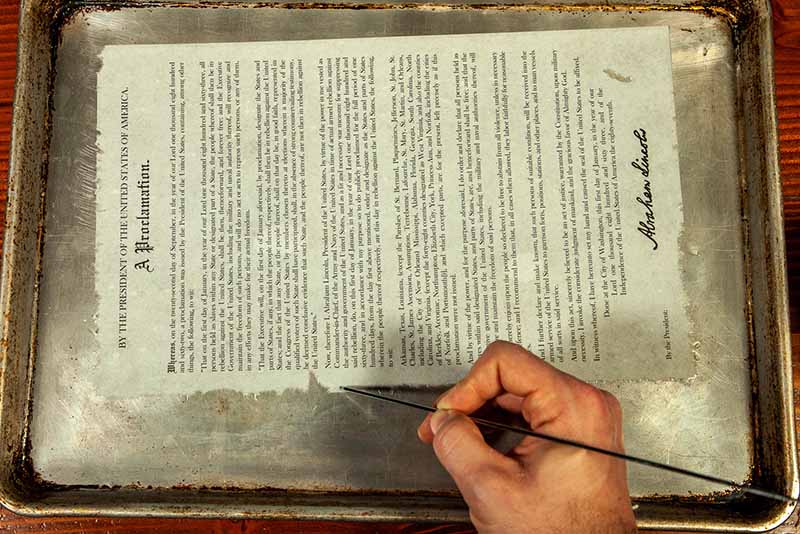
To me, this gives the most natural looking weathered edges, especially when you’re trying to make a historical document that came from the desk of Benjamin Franklin instead of a treasure map that has been carried around while digging holes in the dirt.
The edges look like they are more naturally worn, and it’s much easier to control where you tear the edges of the paper.
Preparing the Paper: To crumple or not to crumple
Before we get into staining the paper, we have to decide just how much we want to distress the paper. To me, it depends on the story that you’re trying to tell (and just how much you care).
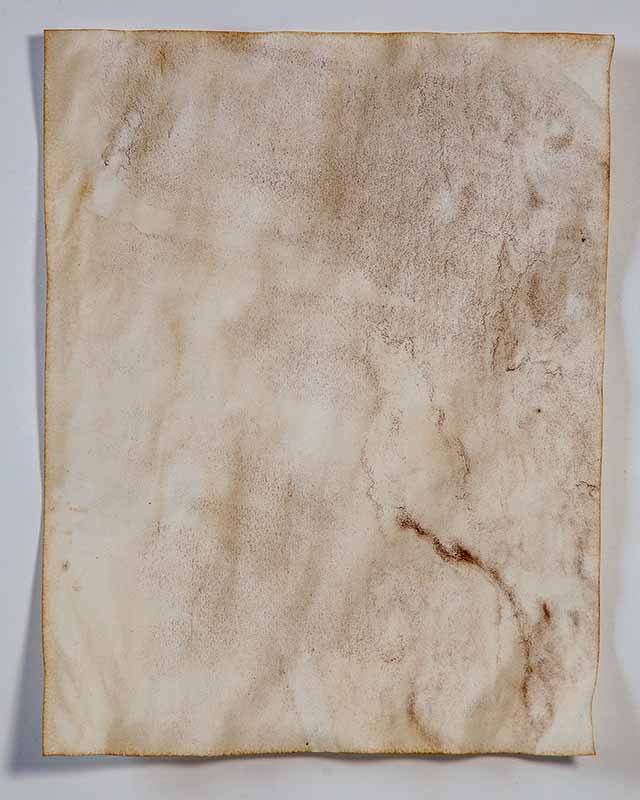
For my Caesar Cipher Treasure Hunt I decided to go super old looking so I crumped the paper quite a bit.
You can crumple the paper before staining, smooth it out and then stain, which will give the paper some texture .
And if you want to have a lot more wrinkles, you can crumple the paper while it’s still wet from the coffee/tea stain (in the next step). As the paper dries, it will hold a lot more of its wrinkles
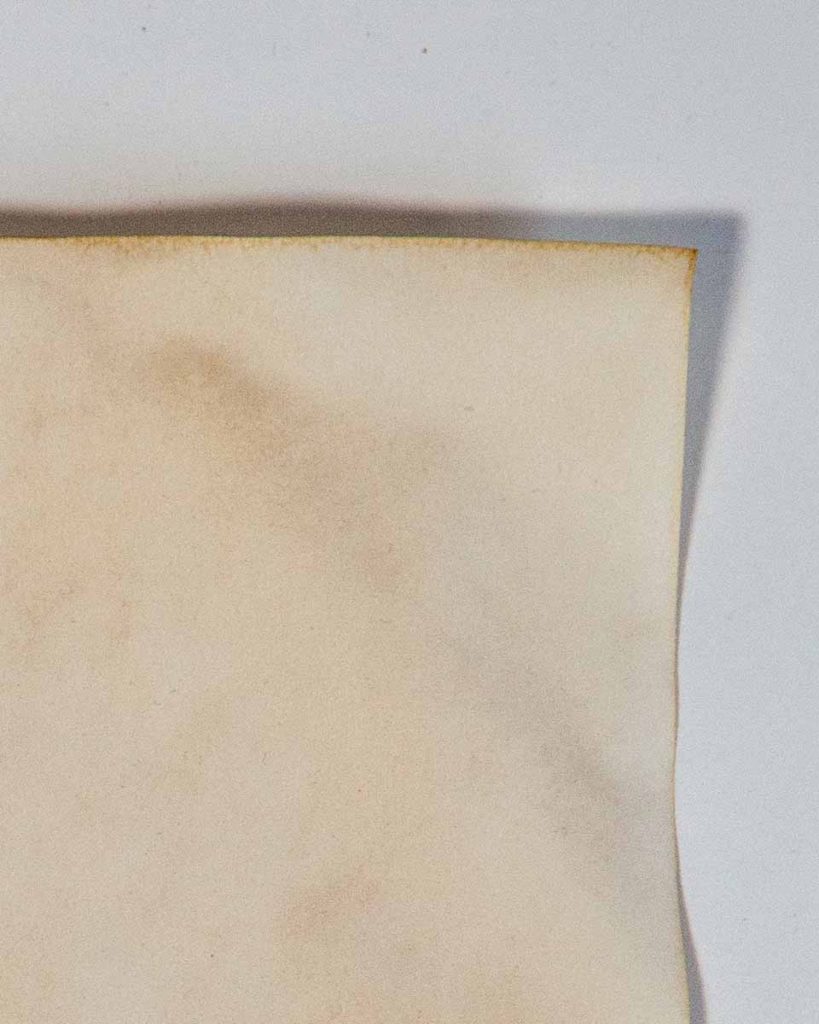
When I was making my Ottendorf Cipher Treasure Hunt, I wanted to frame what looked like an old letter or famous speech. This would have been better taken care of but still old and weathered.
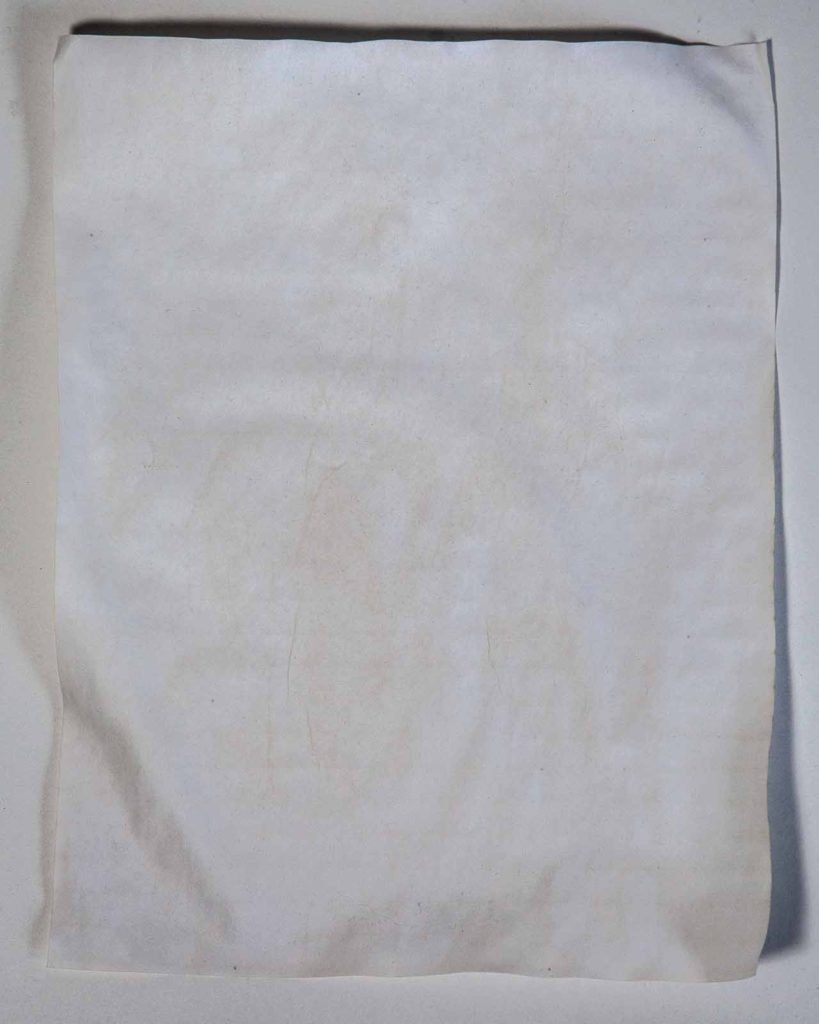
I decided to make this one much more subtle and didn’t crumple the paper at all. Wetting the paper when it was stained was enough to give the whole paper some texture, so crumpling wasn’t necessary.
Staining the Paper: Coffee or Tea?
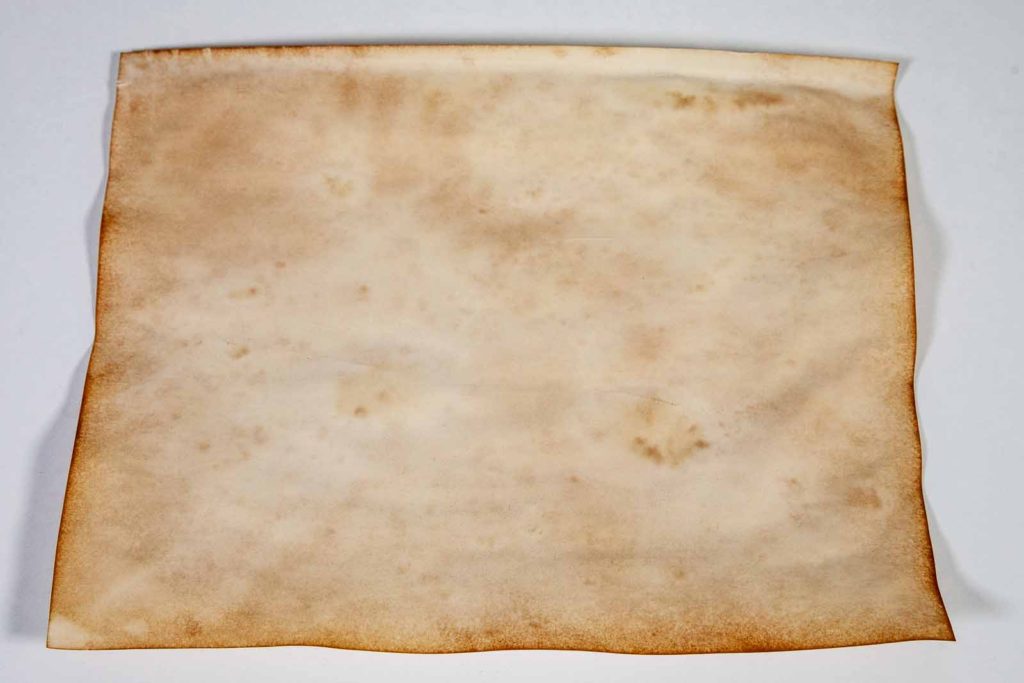
There are two common stains you can use to age your paper: coffee or tea. Not only do coffee and tea have pigments that color the paper, but they are both tannic, which helps oxidize the paper quickly and makes it look more naturally aged.
The process for staining with coffee and tea are the same, but the results have some differences. If you want a really light color, use a green tea.
You can go a little darker by using black tea or coffee. Obviously, if you’re looking to go darker still, brew a stronger tea or coffee. You can see in the pictures below the difference between coffee, a single black tea bag, and two bags.
If you’ve stained your paper and you still want it darker, you can always re-stain it. If you’re looking for something really dark, let the paper sit in the stain longer (30 seconds to a minute)
One of the main differences I found using coffee versus tea are the edges. Coffee gave more color on the edges versus even the strongest brewed tea.
The way you brew your coffee can also make a difference. I found that a standard coffee pot of Folgers gave a similar darkness to black tea. If you want to add a little grit to your paper and make it look a little dirty, use the very last bit of coffee from a French press. You can also let the coffee sit and use the dregs at the bottom.
The grit from the dregs of the coffee will give some more texture and make it look a little dirtier.
How to Stain Paper with Coffee and Tea
You have a couple options of applying the stain to the paper. The first is to take a brush and brush the coffee/tea on the paper.
The second way is to pour the tea in a baking dish or tray and dip the whole piece of paper in the liquid (just for a couple seconds. Any longer and the paper will fall apart). Then take the paper out and let it dry.
If I plan to wrinkle the paper a lot, I like to use this method because it’s easier to wrinkle the wet paper. It can get a little tricky to pick up paper when it’s wet because it can stick to a flat surface. It’s not impossible (or even that hard) to pick up wet paper on a flat surface, but I have made more accidental rips this way.
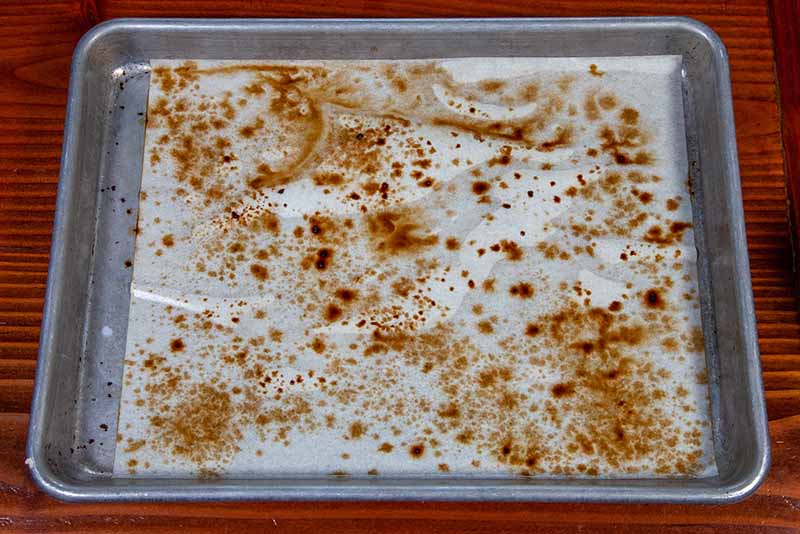
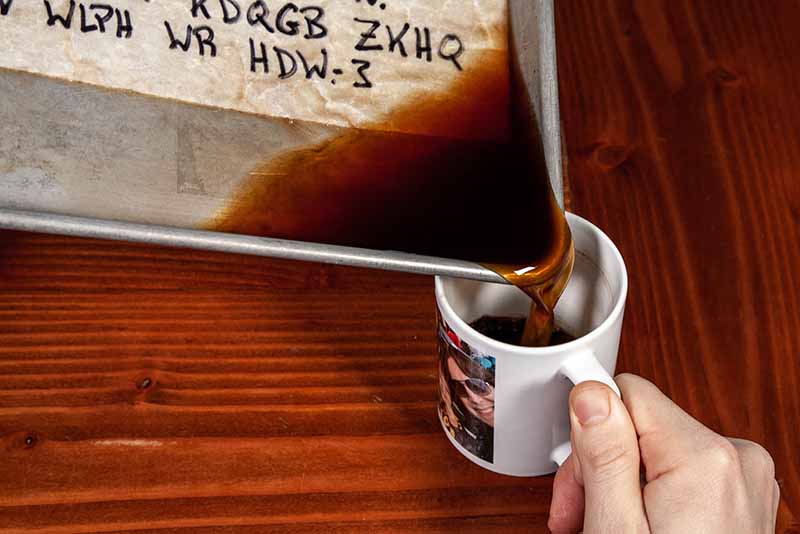
The third is to place the paper in a baking sheet and pour the liquid onto the paper, let it sit for a minute, and then pour the excess off.
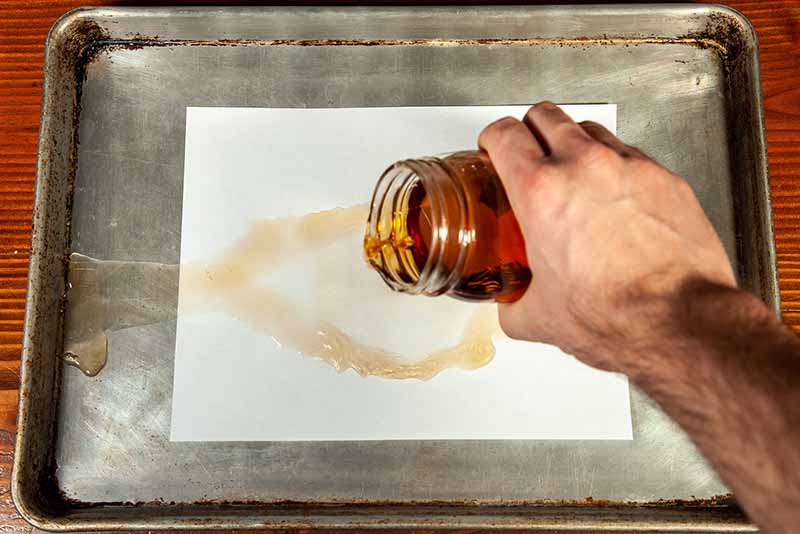
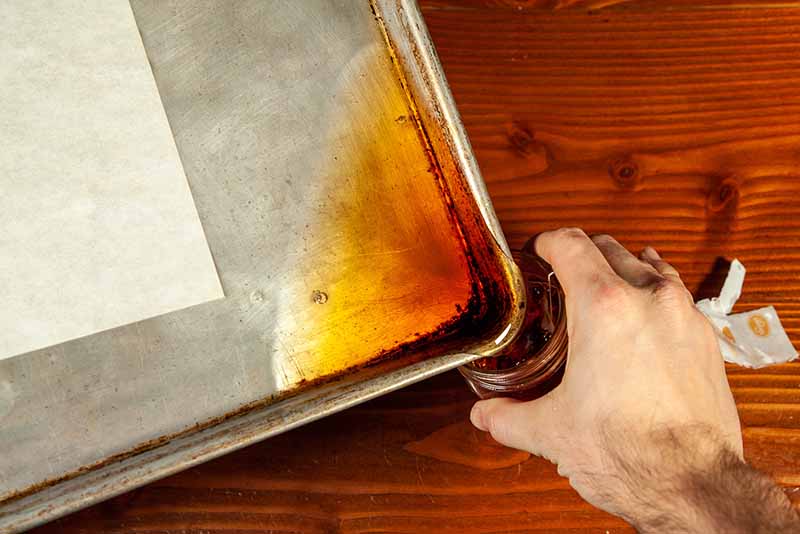
This is my preferred method because it’s the easiest. Be sure to move the tray around and spread the water around. I like to make sure any air bubbles under the paper get pushed out so I don’t have white, unstained spots on the back of the paper.
I especially like this method if I’m not planning on wrinkling the paper. This way I don’t need to mess with trying to pick up the paper when it’s wet.
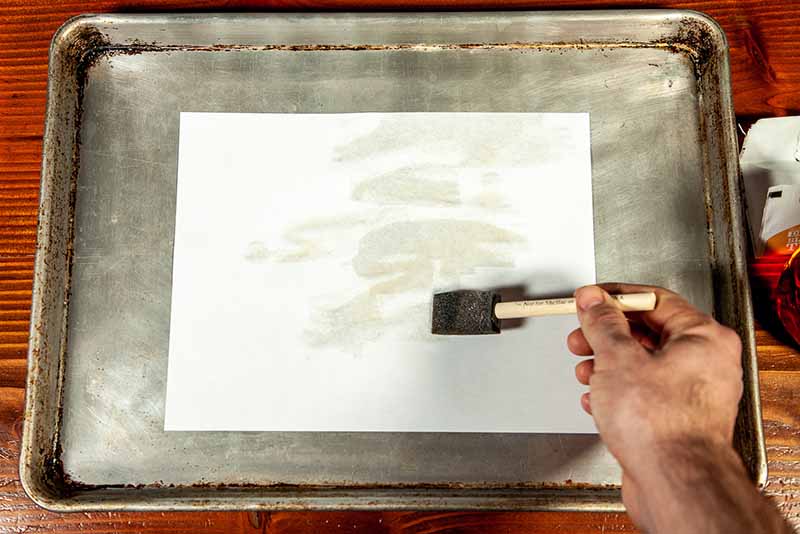
If you would like to have more color to the edges, while the paper is still slightly damp, use a sponge brush and soak some more coffee or tea to the edges. This will allow the fibers in edges of the paper to soak more stain.
Another optional addition you can add when staining your paper is to sprinkle some instant coffee while your paper is still wet. Allow the instant coffee crystals to blossom for a couple minutes.
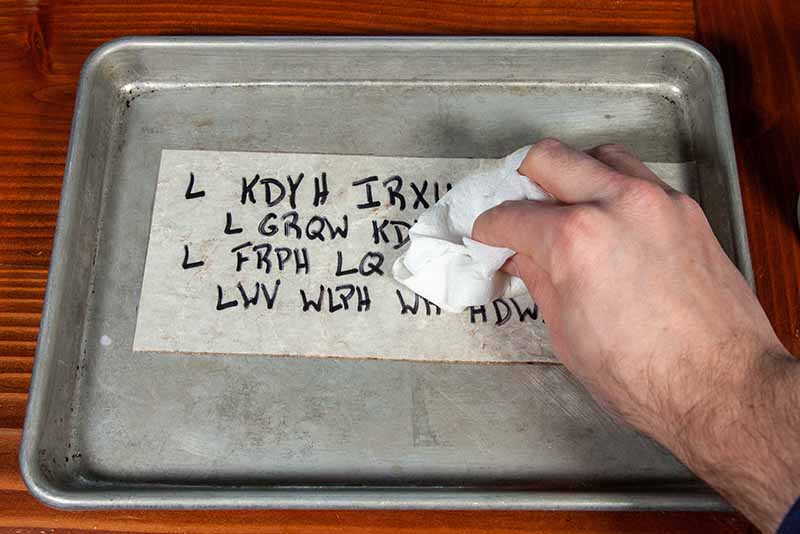
Use some paper towels to dab the wet parts dry.
Drying the Paper: Heating vs Air Drying
The final step to aging your paper, and this is an optional step, is to apply some heat. I personally like to put the paper on a sheet pan, and put in a 185-200 degree (Fahrenheit) oven for about 10-15 minutes. Keep an eye on it though as you are putting a flammable item in a hot oven.
If you do not have the option to set your oven at such a low temperature, you can also use a hair dryer. Set the temperature to a higher setting with the blower on the lowest setting (eventually the paper will dry and you don’t want to blow it away).
You can of course just leave it out to dry. It’ll take a lot longer (you might need to let it dry overnight), but it works fine.
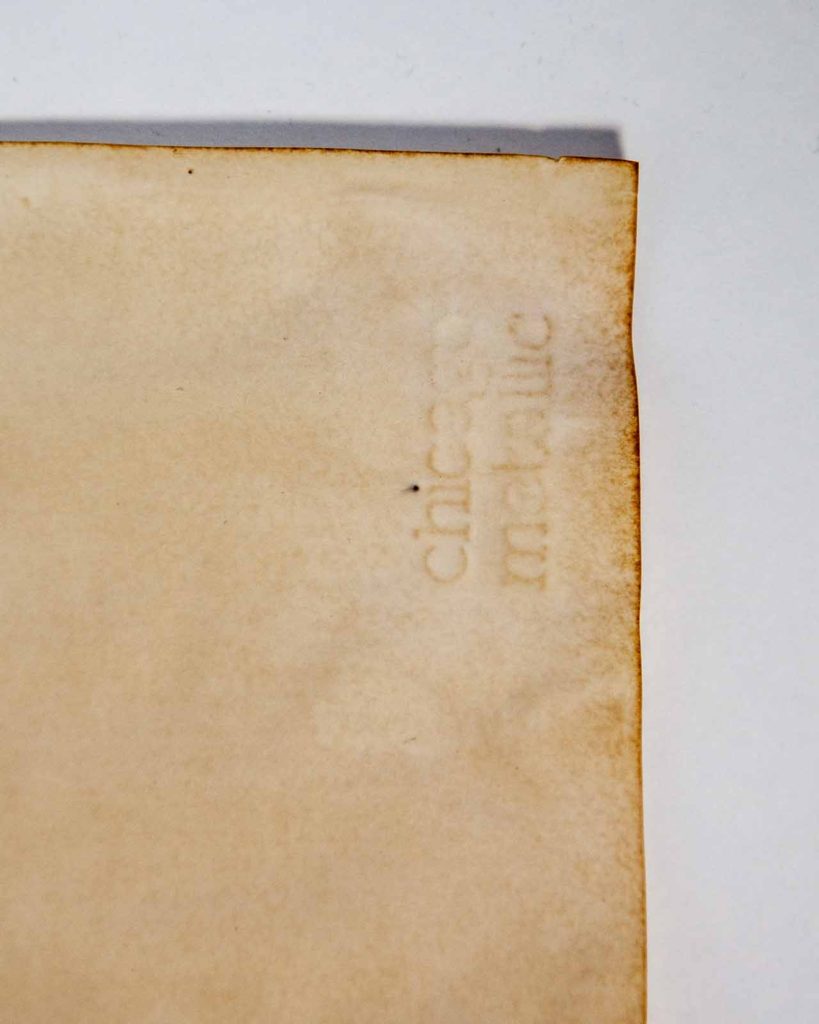
Whichever method you choose, make sure the paper is sitting on a flat surface to dry. My preference is a baking sheet to contain the liquid when I stain it, and then I just don’t move it. Do not use a drying rack! The wet paper will take some of the texture of the rack. This is even worse if you use heat to dry the paper faster.
This is a corner of an oven dried piece of paper that had a raised stamp on the bottom of the sheet pan.
The Super Short Method: The easiest way to make paper look old
So we’ve established I like to be a bit… thorough. You may be the type that doesn’t care about (or doesn’t have time for) doing it yourself and you want the easiest solution.
The simplest way to make paper look old is to get some vintage looking paper online. (This one has the design on both sides of the paper.)
You can often find a similar style of paper in Staples or Walmart in the section where they have resume paper.
Print or draw your map or document, gently tear the edges, crumple up the paper, and then smooth it out. If you want it to look more beaten up, keep crumpling and smoothing your paper until you get a look you want. Super easy.
If you’re looking to make a larger treasure map or want something that’s larger than the standard 8.5×11 in paper, pick up a roll of brown craft paper. Here’s my go to:
Which Method Do I Pick? My preferred step by step approach to make paper look old.
Okay, so you’ve read this whole article and now you’re feeling overwhelmed. There are now too many options and you just want to know what I prefer to do.
Here’s my process, step by step:
1. Print the image/document onto a sheet of printer paper or write/draw using a permanent marker.
2. Crumple up the paper and smooth it out
3. Place the paper on a baking sheet and pour some coffee on it (I personally like the color the coffee gives to the edges). After about 15-30 seconds, pour off the excess coffee. Use a paper towel to dab dry.
4. While the paper is still wet and using the sharp side of a bamboo skewer, flick off pieces of the edges.
5. Dry the paper in a 200 degree oven for about 10 minutes

Now all you need to do is place your newly aged document somewhere for your kids to discover and begin their next adventure in treasure hunting!
Recent Posts
Growing up, one of my favorite movies was The Goonies (probably like a lot of people). And as a kid, I wanted so badly to discover a secret treasure map in the attic that would lead to some “rich...
I was watching National Treasure with the family last Fourth of July and couldn’t help but ask myself, how can I make a treasure hunt like that for my kids? I mean, who wouldn’t want to live out...