My kids have gotten really into making paper airplanes lately. And in my lifelong quest to teach them new things, I’ve decided to show them a new way to make a paper airplane. This time with a straw. And if they toss it right, it’ll go even farther than a regular paper airplane. Today, we’re making hoop gliders.
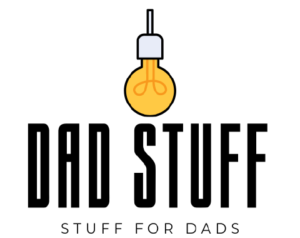
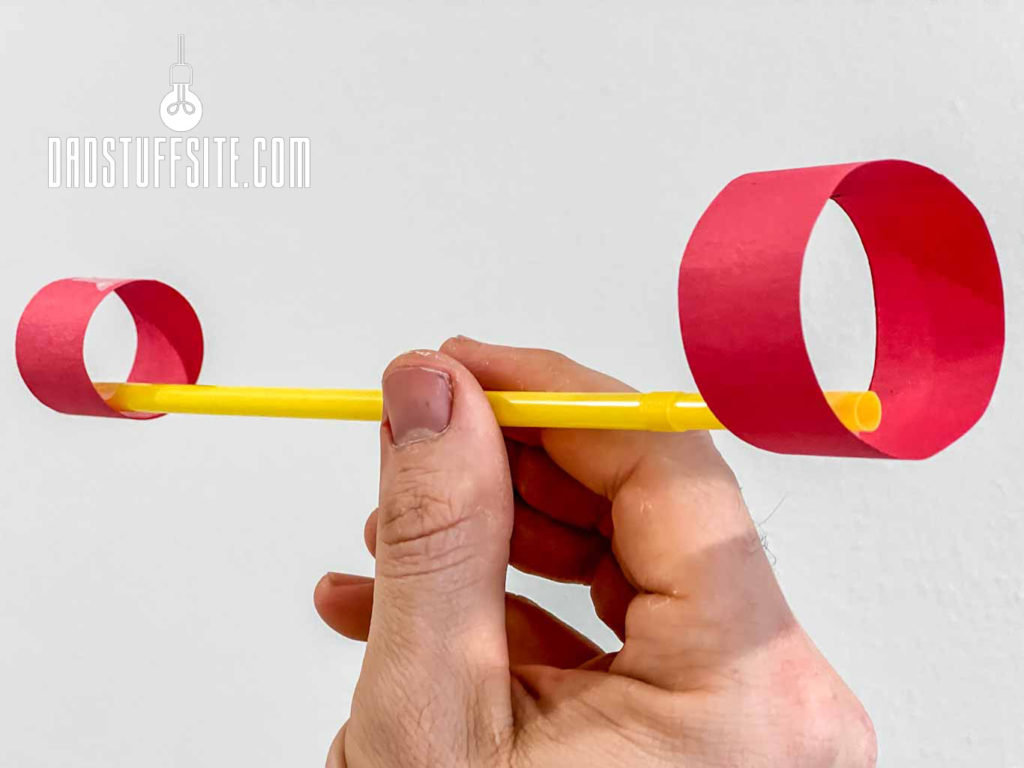
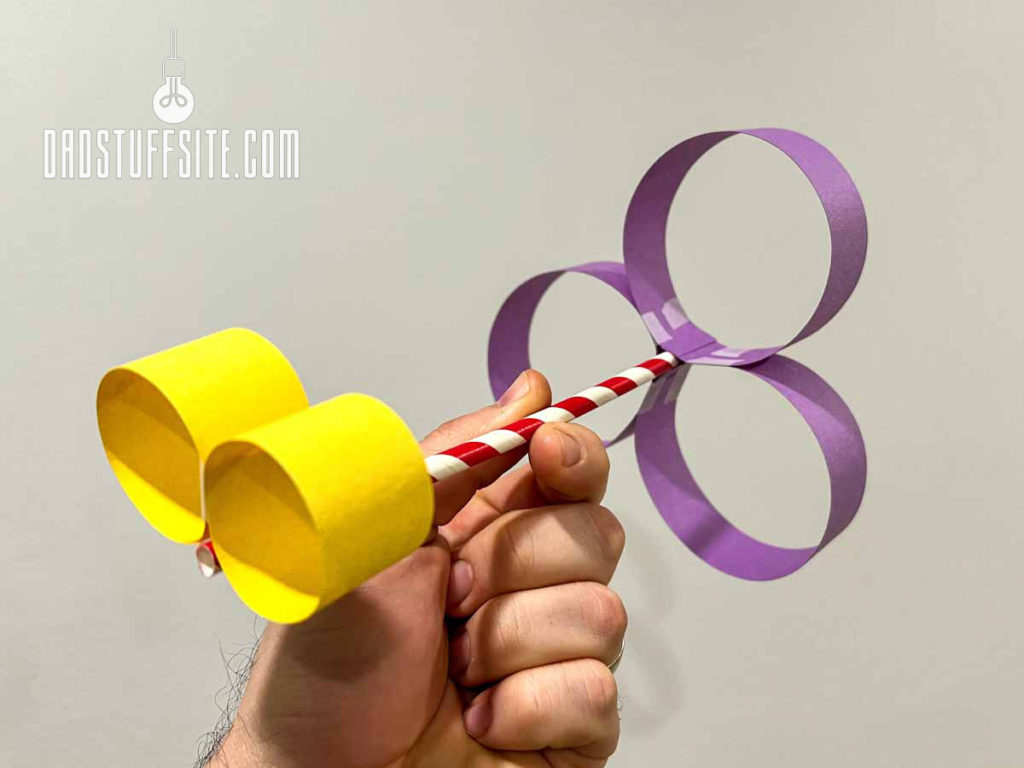
A hoop glider is a straw with two paper rings taped to the ends. The two rings must be in line with each other, with the front hoop smaller than the rear hoop.
For another DIY STEM project, check out how to make Capri Sun Stomp Rockets.
Materials to Build a Hoop Glider
- Drinking straw (at least 6-8 inches long)
- Paper
- Scissors
- Tape
- Ruler

Related: Model Rockets with Kids (What to Get and Where to Launch)
How to Build a Hoop Glider (In 3 Easy Steps)
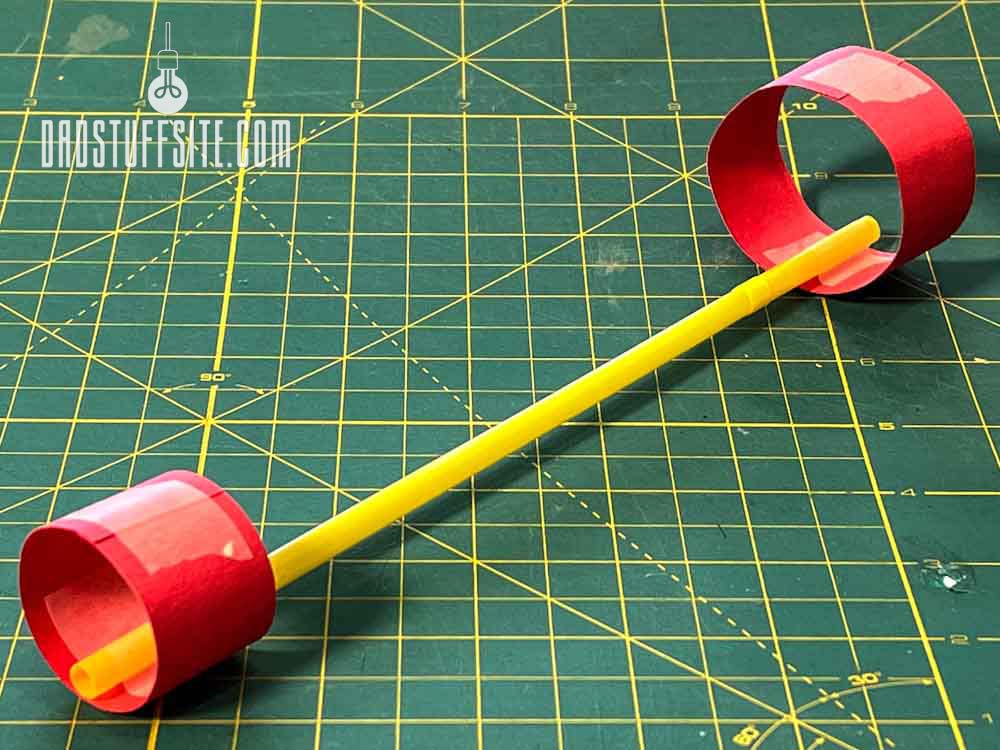
1. Cut the paper into two 1-inch-wide strips. Make one strip about 4 inches long, and the other 6-8 inches long.

Don’t worry about being super precise here. The glider will work well with just about any variation of these measurements. If the widths are roughly the same and one strip is longer than the other, it should fly just fine. In fact, you can skip the ruler all together and just cut one strip from the short side of a sheet of paper, and the other from the long side.
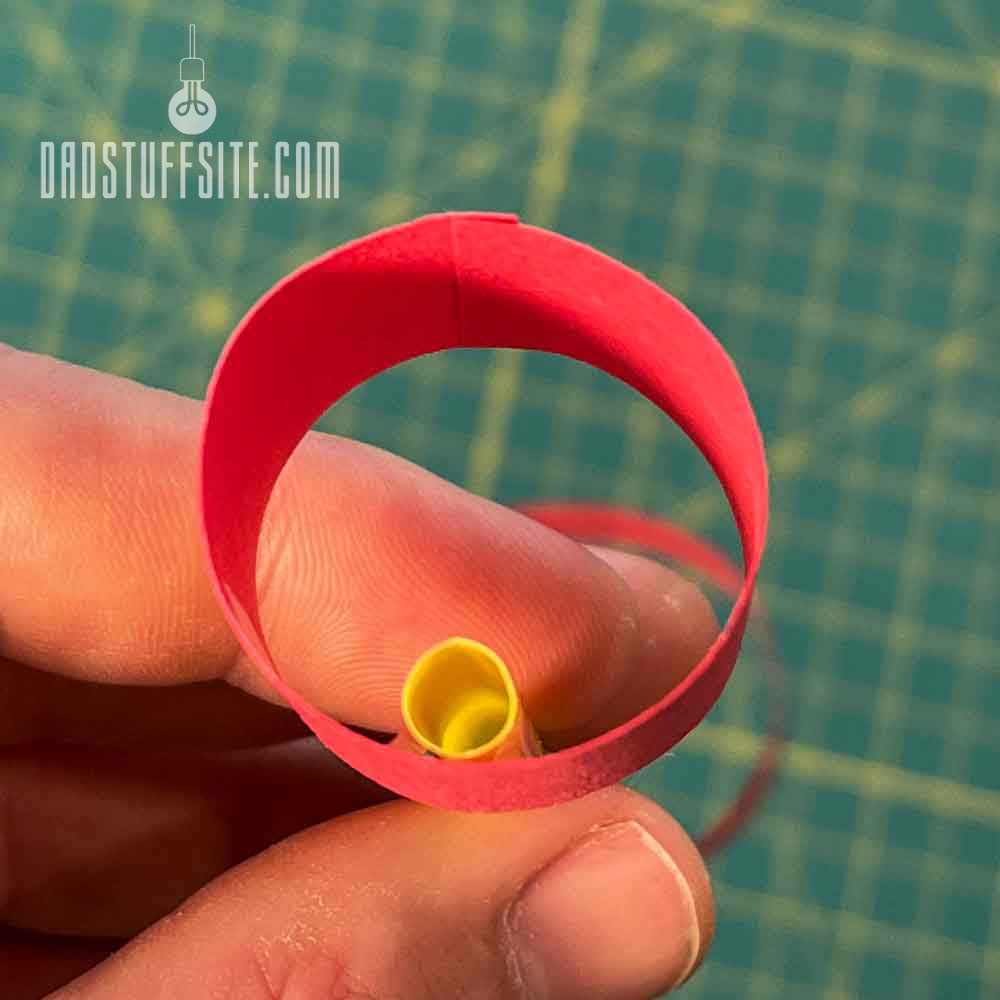
2. Tape a strip of paper on to each end of the straw (some people like to do this last, but it’s much easier to get the hoops aligned this way).
This article is originally from www.dadstuffsite.com
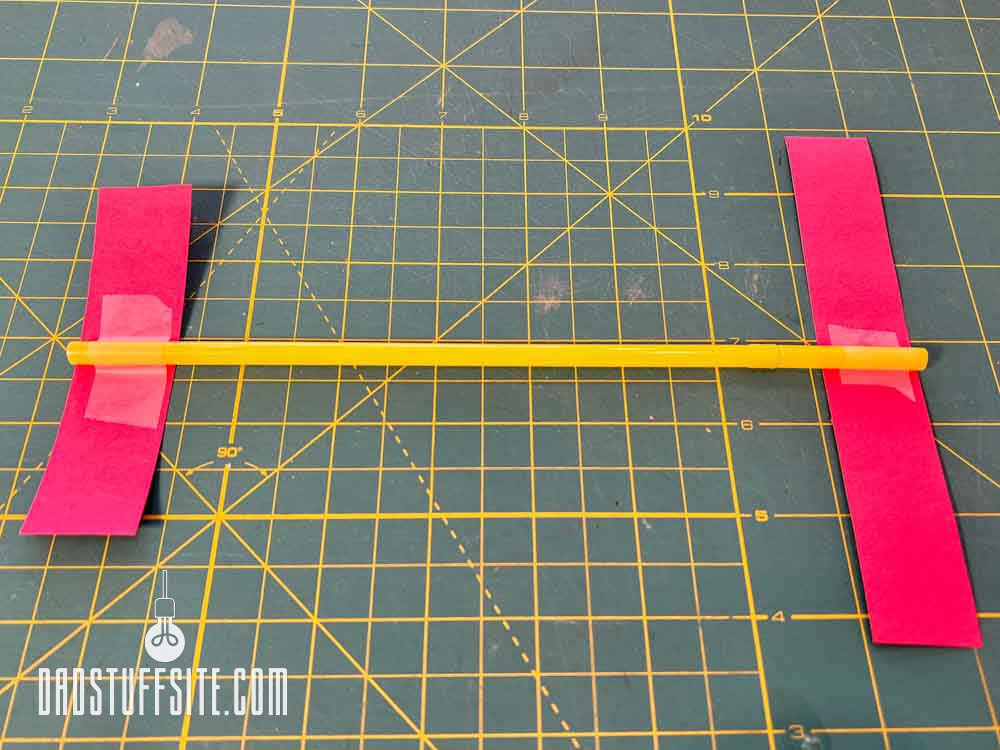
3. Tape the ends of the paper together to make a loop (it doesn’t matter if the straw is on the inside or outside of the loop. All that matters is that the hoops are in line with each other.).
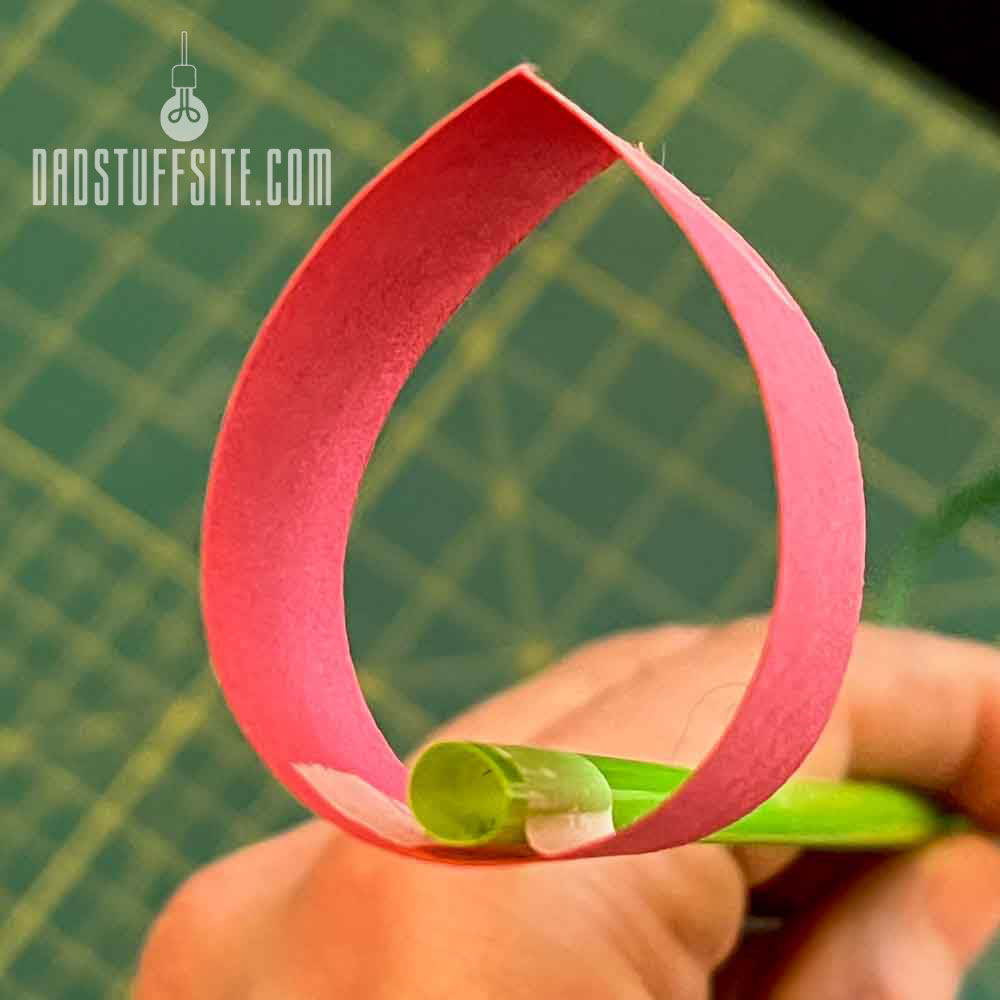
Let the paper slightly overlap to give a better overall curve. If you just tape the ends together, you’ll get more of a teardrop shape.
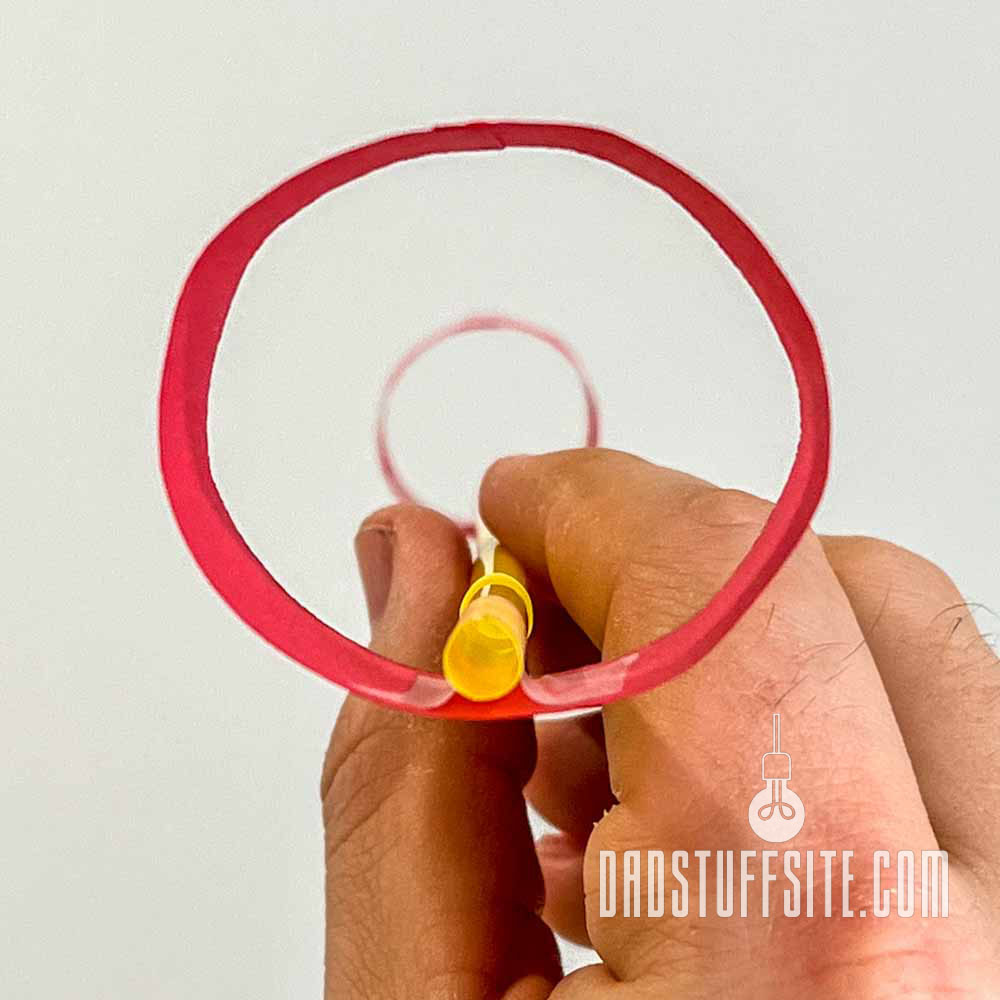
Make sure the hoops of the glider are aligned.
How to Fly a Hoop Glider
Now for the fun part; let’s fly! Hold the straw part of the hoop glider somewhere in the middle, with the shorter hoop in the front. Simply toss it like a dart.
This article is originally from www.dadstuffsite.com
It doesn’t matter if you toss it with the straw on top or the bottom. When you hold the glider, it will want to roll so the hoops are on the bottom. When it flies, more lift comes from the side opposite the straw. So when it flies, the straw will roll to the bottom of the glider.
For another great STEM activity, check out Lego Battle Spinners.
Hoop Glider Activities
Now that you have your hoop gliders, what else can you do with it? Depending on your kid’s personality, you can go in lots of different directions.
If you have a kid that likes to make things colorful and artistic, then go to town dressing this thing up. Patterned straws, washi tape, extra hoops, wild colors. Just go to town. (FYI, the colorful hoop glider below flies incredibly well! In fact, it flew better than the standard two-hoop glider).
If your kiddos are super competitive, then let’s see whose glider goes the farthest. In fact, let’s see what can go farther: a hoop glider or a paper airplane.
If you want to get into engineering principles, this is a great way to introduce your kids to some of the basics of what makes a plane fly. In fact, let’s take a minute to look at what’s going on here with our glider.
Looking for more things to do? Check out The Boredom Jar: 30 Activities for When Your Kids Are Bored
This article is originally from www.dadstuffsite.com
How Does a Hoop Glider Fly?
As I was about to explain to my kids how a hoop glider flies, I realized I didn’t have a very good answer. I have at least a basic understanding of Bernoulli’s Principle, that faster-moving air has lower pressure than slower-moving air.
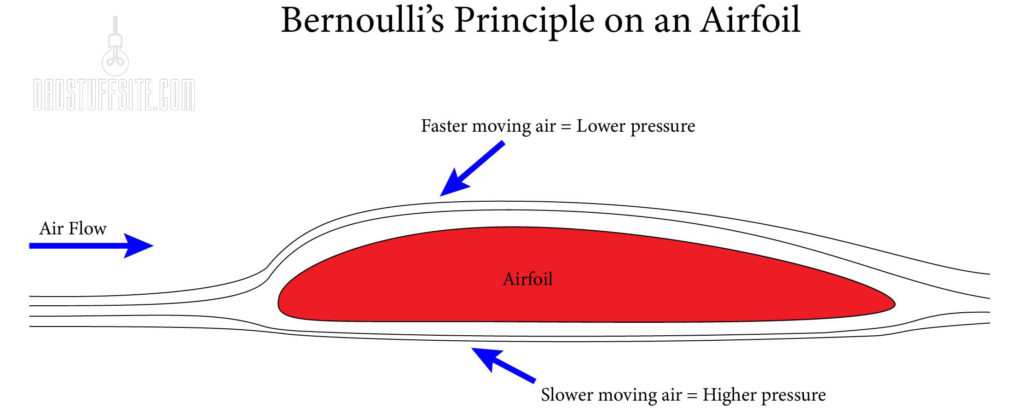
This is how airplanes fly. If you look at the cross-section of an airplane wing, the shape, called an airfoil, has a higher curvature on the top of the wing than the bottom. This creates faster-moving air on the top than on the bottom, which creates lift.
But there’s more going on than just lift. In fact, there are 4 forces to flight: lift, thrust, drag, and gravity/weight. In the case of our hoop glider, you create the thrust when you toss it, drag is created by the wind resistance against the straw and paper, lift is created by the hoops, and the weight is caused by the force of gravity.
The forces of gravity and lift work against each other, and the forces of thrust and drag work against each other. But when the forces are balanced, we have flight.
This article is originally from www.dadstuffsite.com

The back hoop, being slightly larger, has more drag than the front. This helps keep the glider balanced. Therefore, when you try to toss the glider with the big hoop in the front, it doesn’t glide right (try it and see for yourself).
Here’s the problem I faced (and I have to say, the internet failed me by not providing a satisfactory answer… until now): how does a hoop glider stay up when there is no airfoil? What is creating lift?
Luckily, my day job is at a university, so this meant sending my annoying questions to the faculty in the engineering and physics departments. While I may not be an expert in the field, they certainly are. And here’s what I found out.
Related: 6 Secret Codes and Ciphers to Teach Young Kids
Hoop Glider vs. Paper Airplane
The glider actually produces very little lift because there is no proportionally significant airfoil. The glider is balanced and can fly straight for about as far as you can throw it.
The principles of flight for a hoop glider aren’t different from a traditional paper airplane (which also doesn’t create very much lift). The difference is that the materials in a hoop glider are much lighter (which lowers one of the four forces of flight), and there is much less surface area creating less drag (another one of the four forces).
Therefore, the other two forces that work in opposition to weight and drag (lift and thrust), work much more efficiently. The hoop glider can have a long glide time but can’t handle too much thrust. If you try throwing the glider as hard as you would throw a paper airplane and you’ll see that the glider just can’t handle that much thrust.
Check out this video of John Collins who in 2012 broke the world record for distance thrown on a paper airplane. He does a great job explaining some of the physics of how paper airplanes fly:
This article is originally from www.dadstuffsite.com
The two sizes of hoops also help give balance to the glider. The back hoop creates greater resistance (because there is more surface area) while the front hoop helps keep the glider on course.
Without going down another rabbit hole (this was plenty for my brain to handle), there also needs to be a balance between the center of pressure and the center of gravity. Generally, uniform lift for a plane needs to have these two factors in the same place.
But remember that the weight and drag factors are much lower than their opposing factors (compared to a traditional paper airplane). This makes it easier to have the center of pressure and the center of gravity around the same place even if we change some of the hoop sizes (as long as the rear hoop is generally equal to or larger than the front hoop). That means we have some wiggle room in how we can design our hoop glider.
You can make a glider with same-sized hoops that will fly, but it will fall more quickly than a glider with a larger rear hoop. Conversely, if you make the rear hoop proportionally too big compared to the front hoop, it will be so out of balance that it will not fly.
This is a great time to practice those engineering skills and test out some hypotheses. How much can you change the difference in size between the two hoops? What happens if the hoops are 4 inches wide instead of 1 inch? What if you add a small airfoil to one or both hoops? Can you change the shape of the hoops to triangles or squares?
Try lots of designs and learn about one of the great lessons of engineering: keep making mistakes and learning from them!
Related Posts
It’s summertime and I’m looking for places to go and things to do with my kiddos. The other day we went to a maker camp at my local library (FYI: if you’re looking for activities for the kids,...
The weekend is coming up and the wife is out of town. That means I’m on full time Dad Duty. One of the things I learned when I have a long period of time with two kiddos and no back up from...