
The big day has finally come. You bought your daughter or son a bike and it’s time for the first riding lesson. But don’t grab the bike and run outside quite yet – you’re going to want a plan. The last thing you want is for all the fun to be sucked out of the big moment (for all parties involved) as your child waits for you to fill tires or make adjustments to the bike.
So before you start bike-riding class, here’s a checklist of things to decide, prepare, and grab before you call your child outside.
1. Choose a Method for Learning to Ride a Bike
The first thing to figure out is how you plan to teach your child to ride a bike. Do you want to use a balance bike or training wheels? Or do you plan to just jump in and teach them how to pedal without any other steps?
Chances are, if you’re at this point, you’ve likely bought a bike already. If not, you may want to consider buying a balance bike (if you’re not sure what a balance bike is, check out this article). They’re a great way to teach a young child (1.5-5 years old) to ride a bike.
If you already have a bike, don’t worry! There are two options for learning to ride a regular pedal bike without buying a balance bike. The most common approach is to use training wheels. I personally do not like training wheels and have not found them to be helpful (check out 10 Reasons to NOT Use Training Wheels if you want to learn more).
But everyone’s experience is different, and if you want to go the route of training wheels, then by all means go for it!
The other option is to remove the pedals and turn the bike into a temporary balance bike. This is a great way to teach the most challenging fundamental of riding a bike: balancing. And the best news is it doesn’t cost anything. Just take off the pedals! (Check out Turn a Kids Bike into a Balance Bike to learn more.)
2. Adjust the Seat Height
The height of the seat will depend on which method you choose to teach your child to ride a bike. Generally, a balance bike (or bike without pedals) will have a lower seat than your first pedal bike (or a bike with training wheels).
One of the easiest ways to set the bike seat is to first measure your child’s inseam. The seat height of a balance bike (or bike without pedals) should be about 1 to 1 ½ inches below the inseam. If you plan to start with a regular pedal bike (or training wheels), the seat height should be the same height as the inseam.
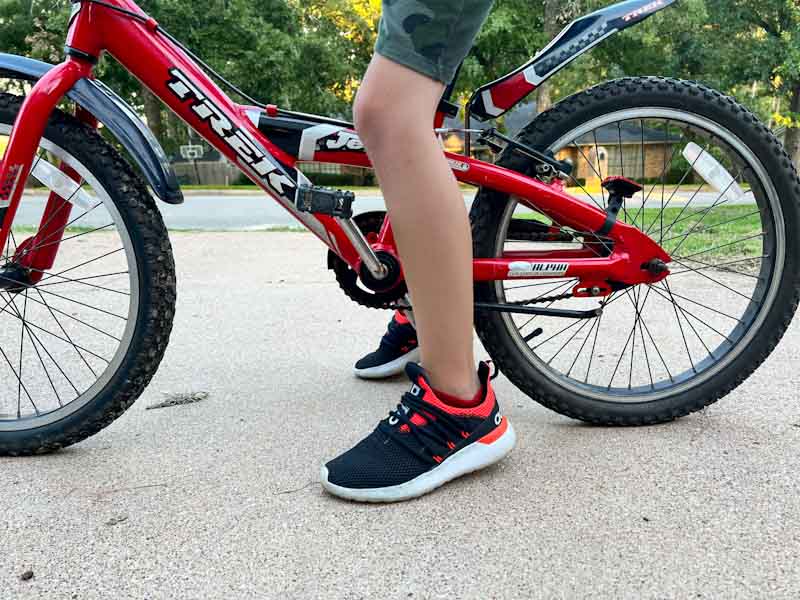
But even with these measurements, you will still need to make some final adjustments. Have your child sit on the balance bike seat with their feet on the ground. They should be able to have their heels on the ground with a bend in their knees.
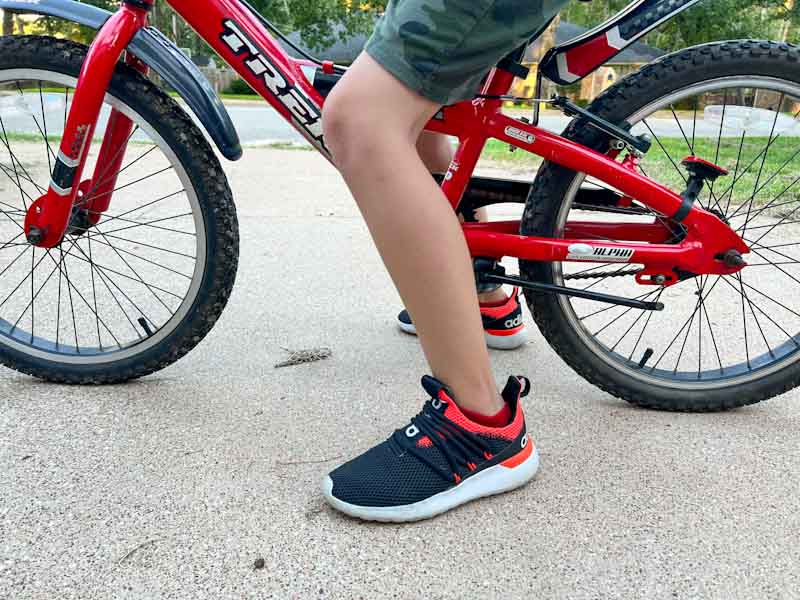
For your first pedal bike or training wheels lesson, the balls of your child’s feet should both comfortably touch the ground with only a slight bend in the knee.
I recommend measuring your child’s inseam and setting the seat long before the first bike lesson. Then, when you’re ready to start, make any final adjustments with the child sitting on the seat (that way he or she won’t be waiting around for too long).
If you want to learn more about adjusting the height of a bike seat, check out Best Bike Seat Height for Kids (Finding the Right Fit).
3. Take Off (or Put On) the Pedals
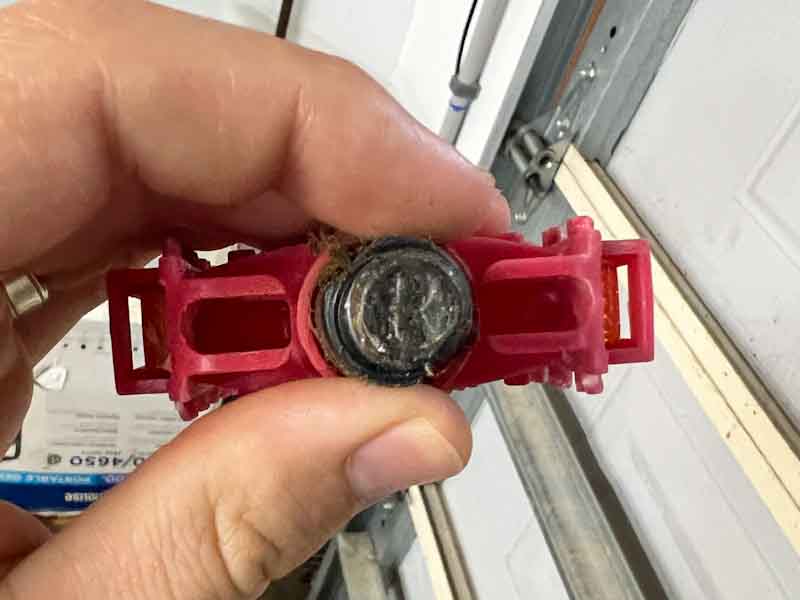
If you already have a pedal bike and plan to focus on balancing, then you’re going to want to take off the pedals. First grab either a 15mm wrench or a bike pedal wrench. The right pedal (that is, the pedal on the right when you’re sitting on the seat) will unscrew normally (that is, “lefty loosey”).
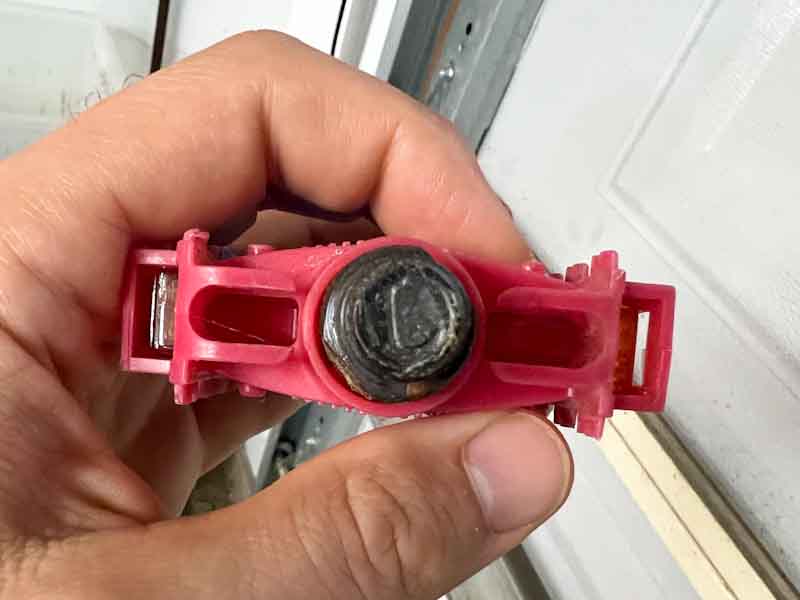
The left pedal is threaded backwards. To unscrew it, turn the wrench in the opposite direction (that is, “righty loosey”). You can put some blue tape on the pedals to mark which one is which, and set them aside. If you forget to mark them, don’t worry. Each pedal is stamped with an “R” or an “L” (or some other indicator) on the end of the screw.
If you plan to keep the pedals on, either skip this step, or, if you took them off, put them back on. The process is the same as taking them off, but in reverse. Remember that the left pedal is backwards, so now it’s “lefty tighty.”
4. Take Off the Training Wheels (or Set them to the Right Height)
If you decide to go the route of training wheels, it’s time to put them on and set the height. Training wheels should not be set to the same height as the rear tire. It should sit slightly higher than the back tire.
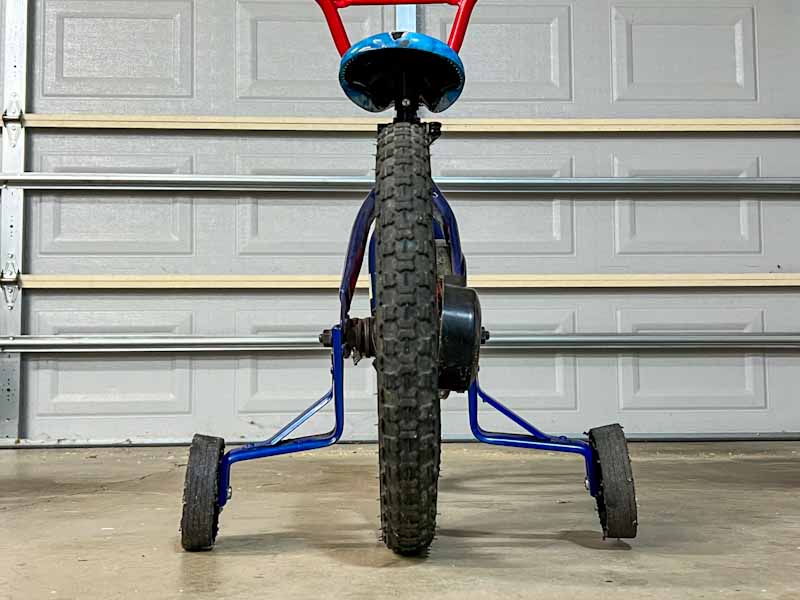
The goal is for your child try to balance as much as possible with the training wheels catching them if they get off balance. Both training wheels should not touch the ground at the same time.
If your first lesson is without training wheels, then simply unscrew them from the bike and set them aside.
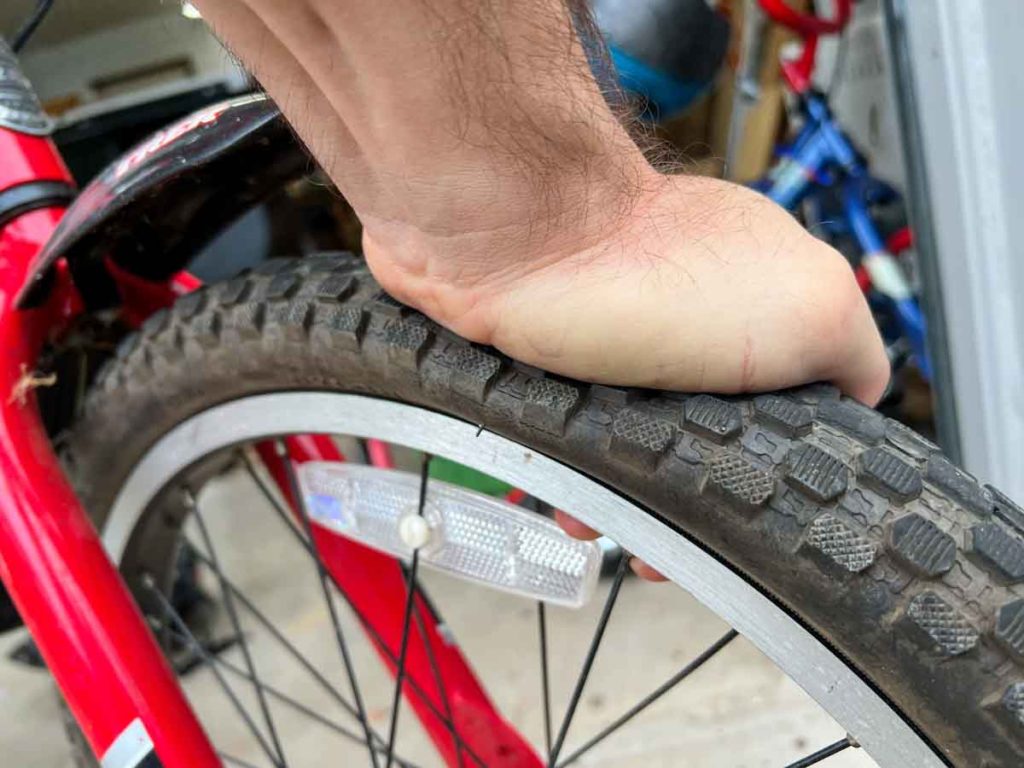
5. Check the Tire Pressure
You can check the tire pressure in one of two ways. If you want to be precise, use a pressure gauge. You should have one of these in the glove box of your car anyway, so if you don’t have one, buy one. It doesn’t need to be fancy either. At the time of this article, you can get a two pack on Amazon for about $7.
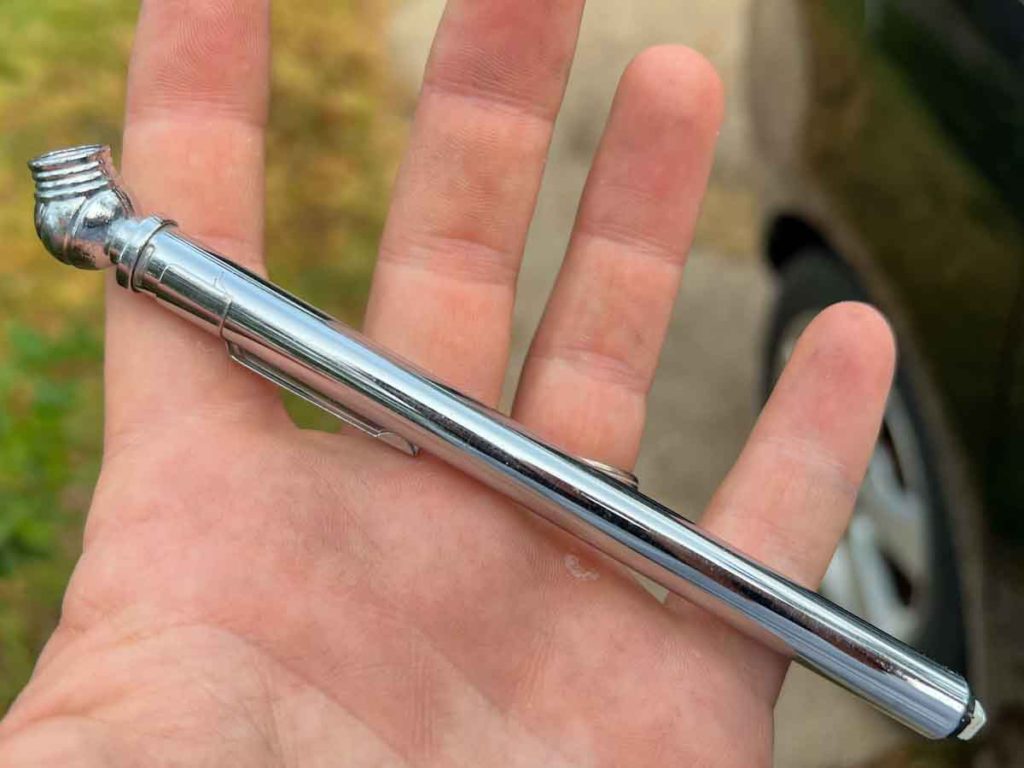
If you use a pressure gauge, a child’s bike tire should be at about 20-40 psi.
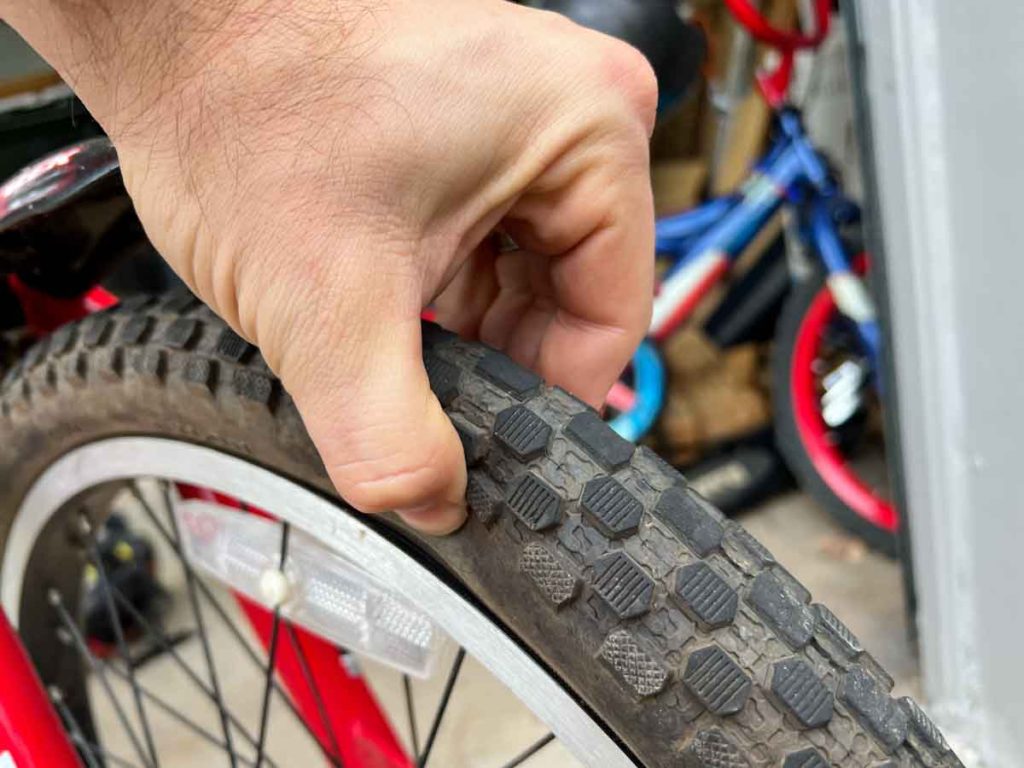
If you don’t have a pressure gauge (or don’t feel like fishing one out), then you can use your hand. Either press down on the top of the tire with the heel of your palm or squeeze the sides of the tire.
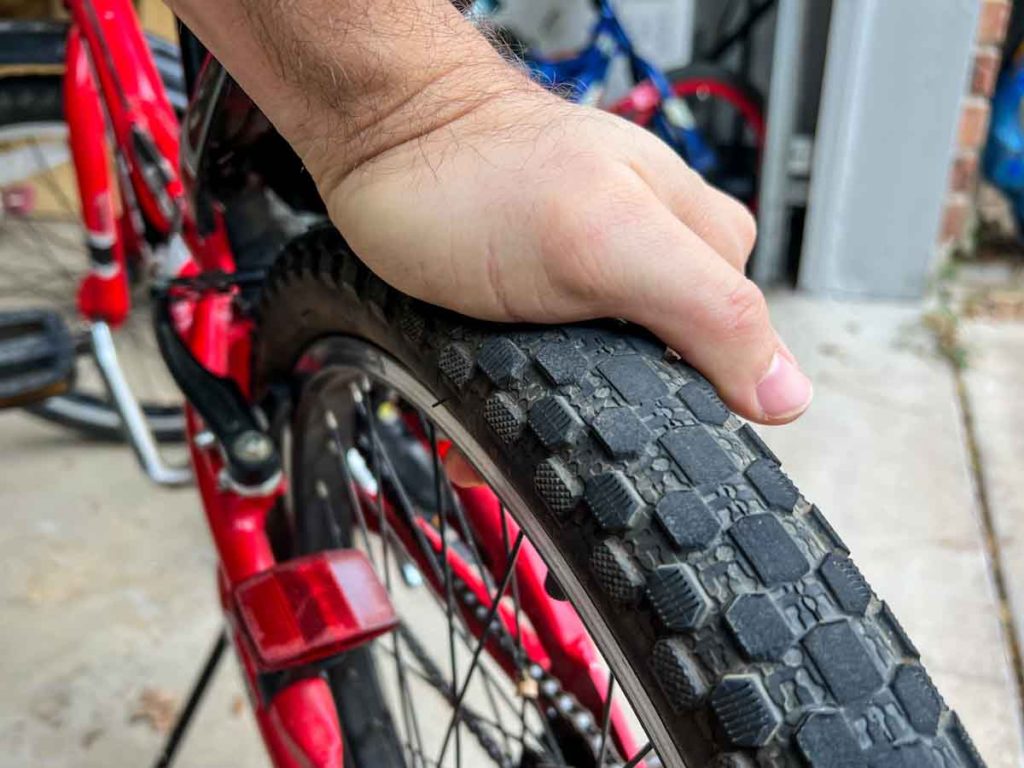
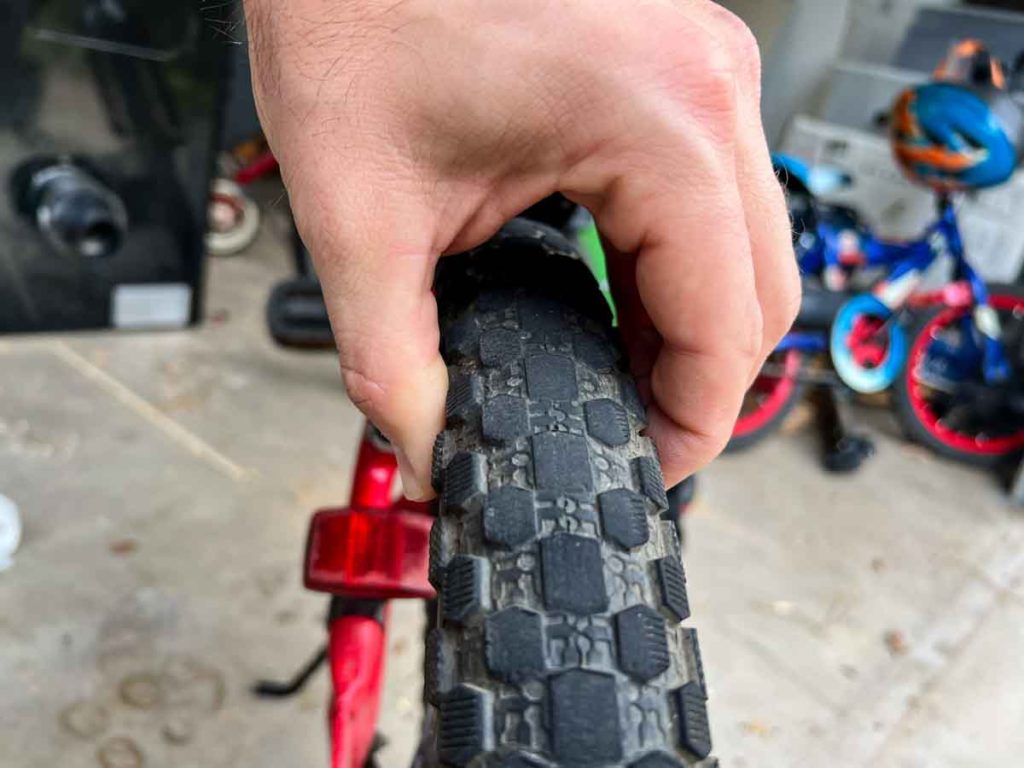
There should be a good amount of resistance. A little give is okay, but not much. If you can make a good sized dent with your hand, it’s time to fill it up with more air.
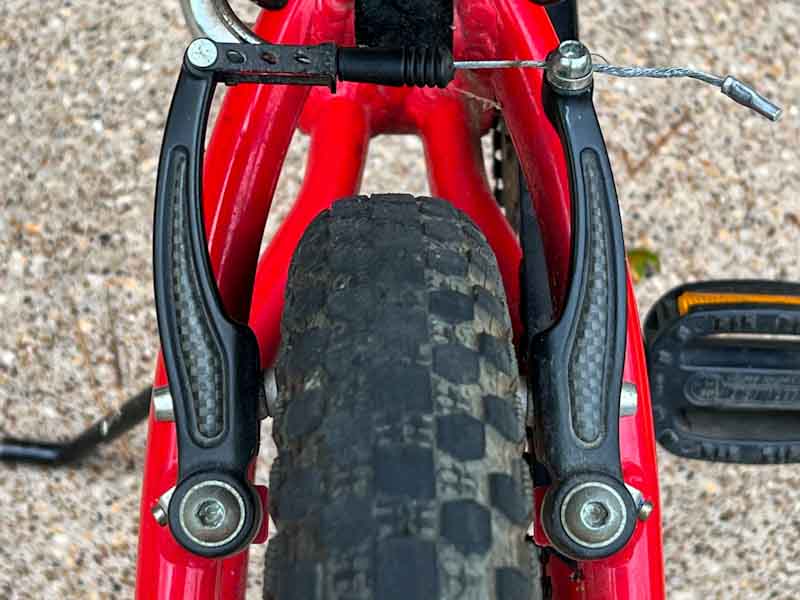
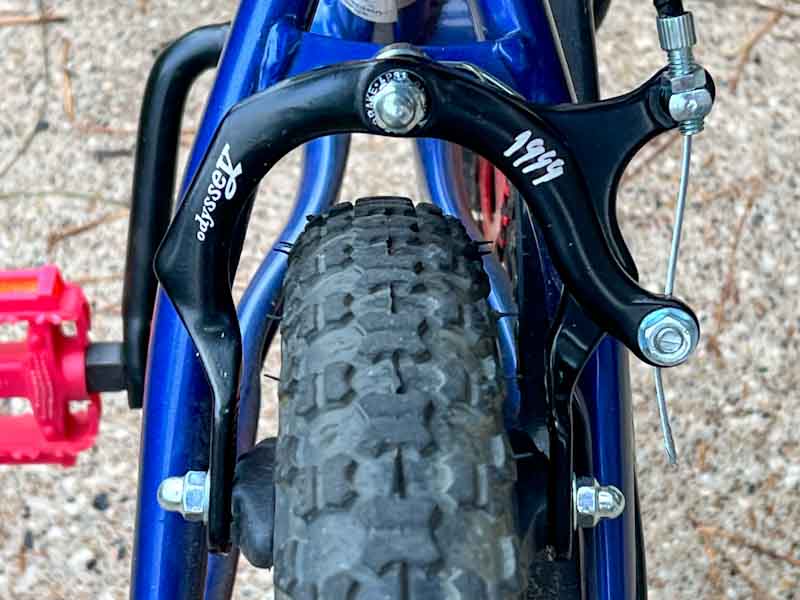
6. Check the Brakes
Your child’s bike should have a hand brake. Most bikes use a back-pedal or coaster brake. This is the kind of brake that works when you move the pedals in reverse. While you may have used this most of your life, they’re not great for beginners. A hand brake is much better.
If your child’s bike doesn’t have a hand brake, buy one. It’s doesn’t have to be fancy, and you don’t need one for each wheel. A simple brake for the rear tire is fine.
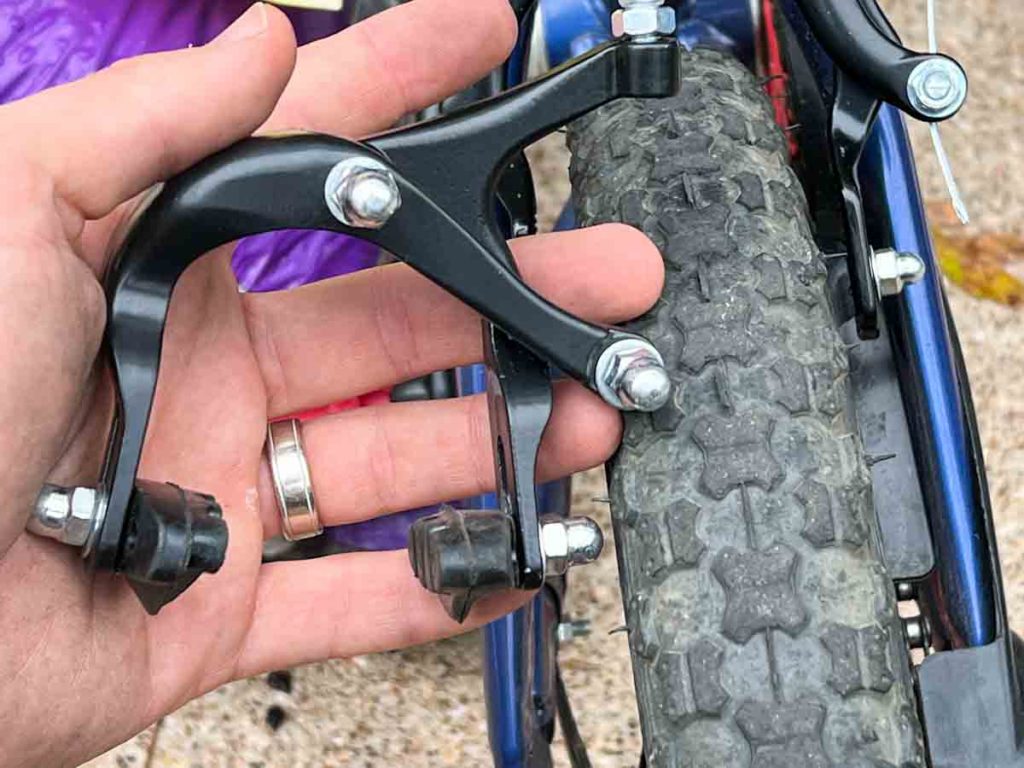
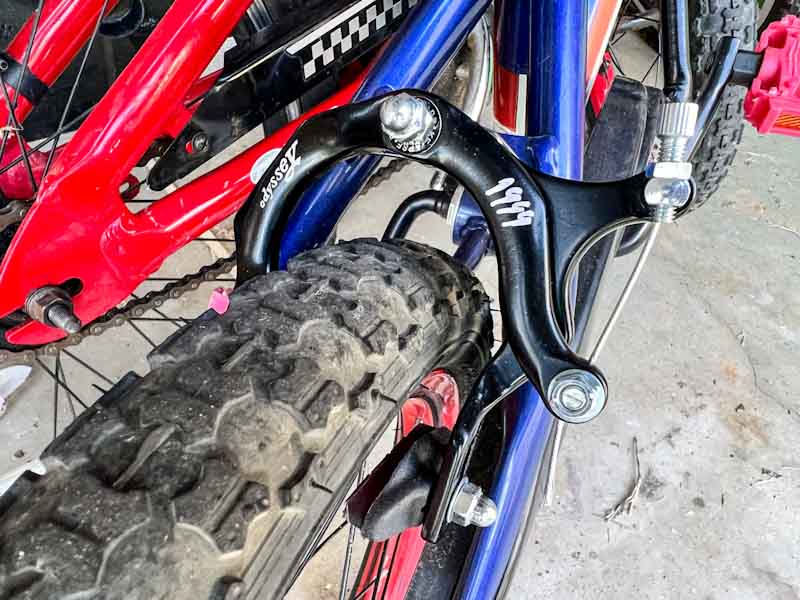
Before you order one from Amazon, check the brake mount on the bike. Some bikes have two places where the brake connects to the bike, and others have one.
Also, double check the measurements of the brake calipers. I made the mistake of not doing this and the brakes I bought were tiny. I have no idea what bike they’re supposed to fit as my child’s bike is the smallest pedal bike you can buy.
If you need a simple brake, go with this one. I have it on my child’s bike and it works great. I got it for under $20, and while the picture didn’t show it, it came with the cable and brake handle.
7. Find a Good Location
Generally, you’re going to want to find a spot that has a smooth, paved surface, that’s relatively flat. This is great for learning to move on a balance and pedal bike for the first time.
If you plan to work on gliding, though, consider a location that has a slight slope. This will help them to use gravity to get a little momentum. It is much easier to balance when the bike is moving than if it is still.
For my kids, I started on the street in front of my house (mostly flat). After spending some time scooting, they were ready to work on gliding, so we moved to the top of the driveway (which sat a little higher than the street). I waited at the bottom of the slope in the middle of the street to watch traffic and help catch them.
8. Clothing/Sunscreen
Okay, I’m trying to not sound too helicopter parent here, so just a couple basics. First, closed toed shoes and definitely no flip flops (check out Can Kids Bike in Flip Flops? (9 Reasons It’s a Bad Idea) if you really want to know why).
You may have ridden barefoot all your life, but the fact is, your child is learning to balance and will be using their feet to catch themselves a lot. Have them wear something that will protect those little feet.
Next, nothing too baggy. That princess dress might be super cute on your daughter, but it’s something that can get caught in the pedals or the spokes. Luckily parachute pants (à la MC Hammer) are not back in fashion. Yet.
And don’t forget the sunscreen.
9. Bring Water
They will get thirsty. Even if they’re not really thirsty, they’re going to say they’re thirsty. If only to give them a little break, bring the water. It’s super annoying to have to drop what you’re doing to argue about it or to have to run inside.
While you’re at it, bring some water for yourself. Let’s be honest, you probably need to be more hydrated anyway.
10. Gather a Simple Tool Kit
I can’t tell you how many times I had to stop what I was doing to run to the garage and grab a tool to make a simple adjustment. You don’t need much and you can probably fit it all in your pocket.
Each bike manufacturer is a little different so there is no standard list of tools you need. Here’s a list of things I’ve had to adjust in the moment:
- seat
- brakes
- training wheels
- pedals
For my kids’ bikes, these are the tools I needed to bring:
- Allan wrench to adjust the seat
- adjustable wrench to tighten/loosen the brakes and/or training wheels
- 15mm wrench to tighten/loosen pedals
11. Adjust the Helmet
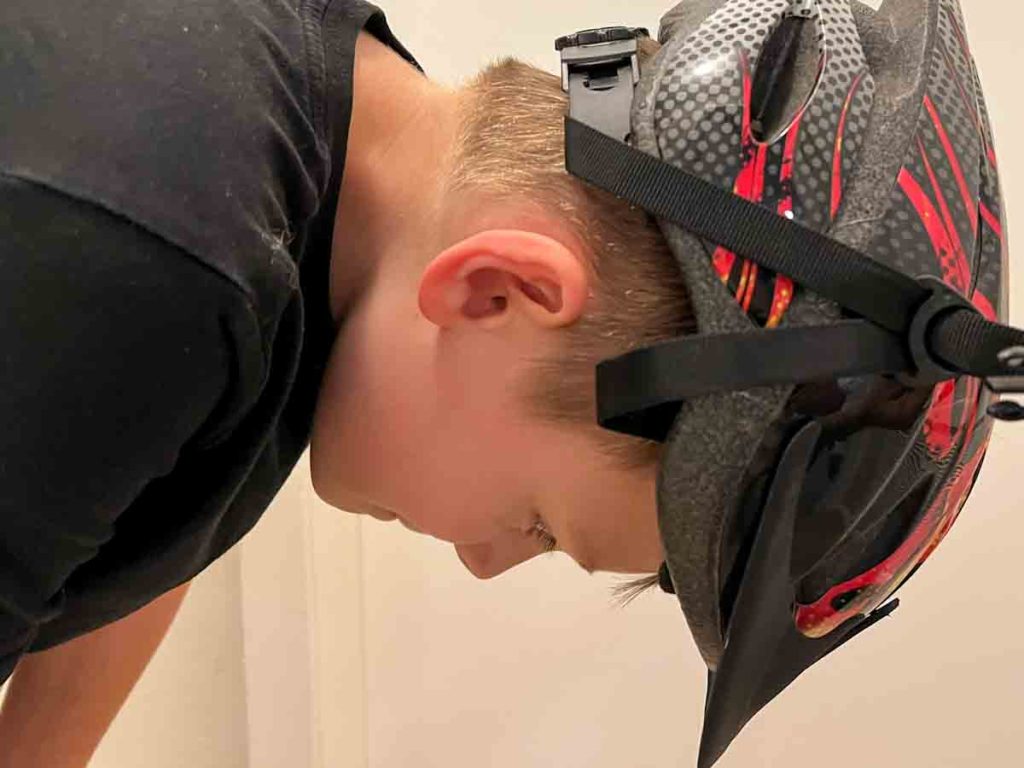
First things first, adjust the optical cradle (this is the adjustment knob in the back of the helmet).
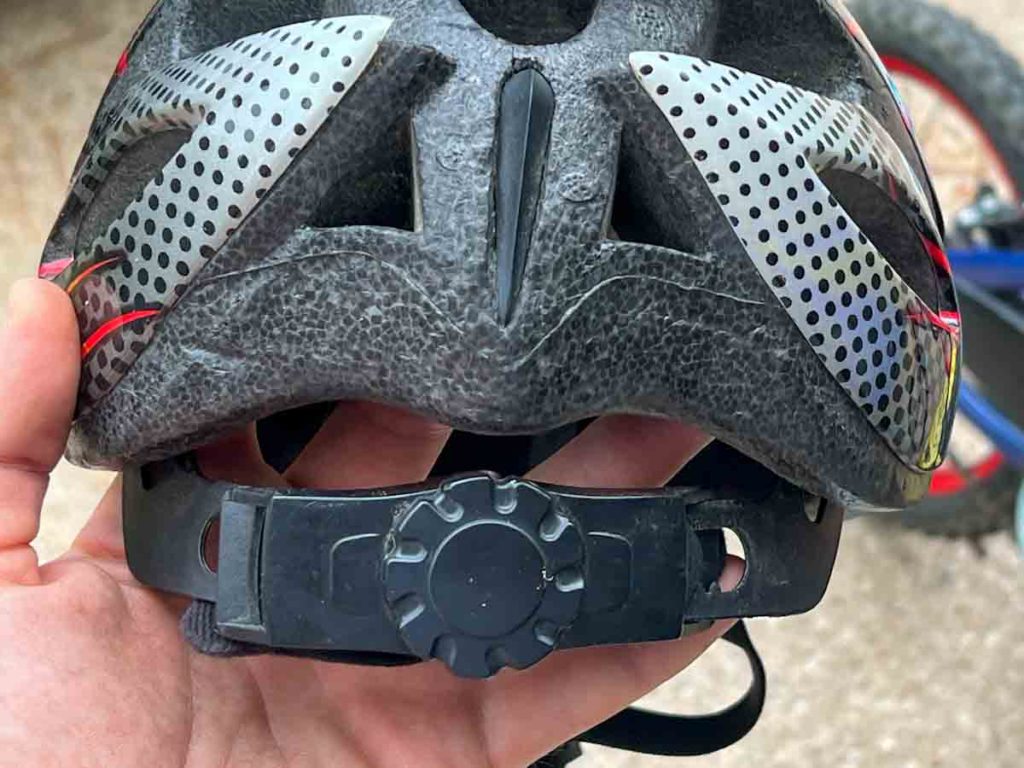
Loosen it so the helmet will fit on your child’s head. With the helmet on, tighten the knob so it fits snuggly (not tight). The helmet should be able to stay on without the straps if your child tips his/her head forward.
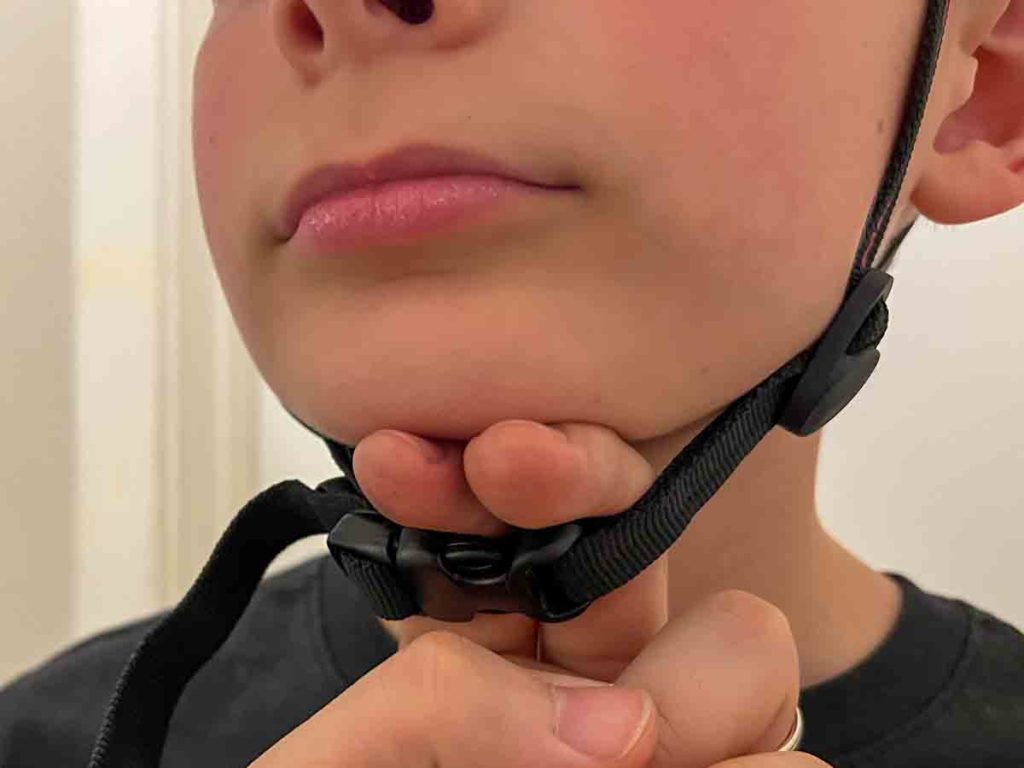
Adjust the chin strap so it fits comfortably under your child’s chin. As a general rule, you should be able to fit two fingers between the buckle and their chin.
12. Set Reasonable Expectations
This is an important step. I know we all fantasize about making a perfect moment with your child. They’re listening to every piece of advice you give (because they always do that…?), and try super hard (because they’re never lazy…?), and come out of our brilliant lesson (because we say things so succinctly and clearly…?) knowing how to ride a bike.
Realistically, this day is likely to be frustrating, especially if this is the first time they sat on a bike. Remember that your kids are human. They probably won’t listen to everything you say, and they probably won’t pick up on the mechanics right away. And while we’re at it, you’re probably not going to be the most patient and precise with your teaching.
The truth is, it’s hard to first learn to ride a bike. Between balancing, steering, and pedaling, there are a lot of difficult skills to learn. Accept the fact that it probably won’t happen in one 30-minute session.
It’s not uncommon for some kids to be pretty anxious about the process. And before we get all, “when I was a kid…,” remember that this is about having a moment with your child. As the dad, it’s your job to be by their side and help them overcome this hurdle
If you find you have an anxious child, you may want to check out Teach an Anxious Kid to Ride a Bike (In 9 STRESS-FREE Steps). It will give you some extra tips to help you help your child. As a dad of a kid who was reluctant to ride his bike, I can tell you that a lot of these extra steps helped him out and now he’s an awesome (and fearless) bike rider!
Today’s lesson is just the first step in learning to ride a bike. Once you accept that, it’s easier to make the whole process more enjoyable. And this is crucial. You want your child to have a positive experience with riding bikes.
Related Posts
Training wheels have been around forever. I know I had them when I was a kid (as did every other kid on the street), and I’m willing to bet most of you had them too. When it was time for my kids to...
I recently taught my two boys how to ride a bike. After our first try, things didn’t go as smoothly as I hoped and I quickly realized I needed some help. After going down some major rabbit holes, I...