
It’s Christmas time and the family’s all together. There are a few things I know to be true about this time of year. First, we all love to cozy up by the fire and watch a classic Christmas movie. Second, if the kids lounge around the TV too much, they start to get a little stir-crazy.
It’s during these moments that there is no longer peace on earth. Or at least peace in the house. If I want to restore joy to the world while everyone is home for the holidays, I’m going to have to come up with something epic.
Time to dust off some of that cipher and treasure hunt research. But this time we’re adding a Christmas theme. I think Santa’s going to have to send the kids on a mission. And the best part is, I’m going to show you exactly what I did so you can do it too.
Dad Stuff Note: this activity reads longer than it seems. Putting an activity into words turns out to be more complex than creating the activity itself.
The Scenario
Before we can get into the clues, we must start with a story. Or as the cliché thespian would ask, “What’s my motivation?” For this Christmas treasure hunt, Santa’s going to enlist the help of all the kiddos in the house (we had a 12-year-old, two 9-year-olds, and a 7-year-old).
It turns out Santa and his crew have been keeping tabs on the Grinch. While his elves would normally do the surveillance, it’s Christmas time and Santa’s a little short-staffed. In order for Santa to communicate with his elves without the Grinch knowing, everything has been hidden or encoded.
The kids will follow the clues and crack the codes to find out where that mean ol’ Grinch is hiding. Let’s get into all the different steps to make this happen!
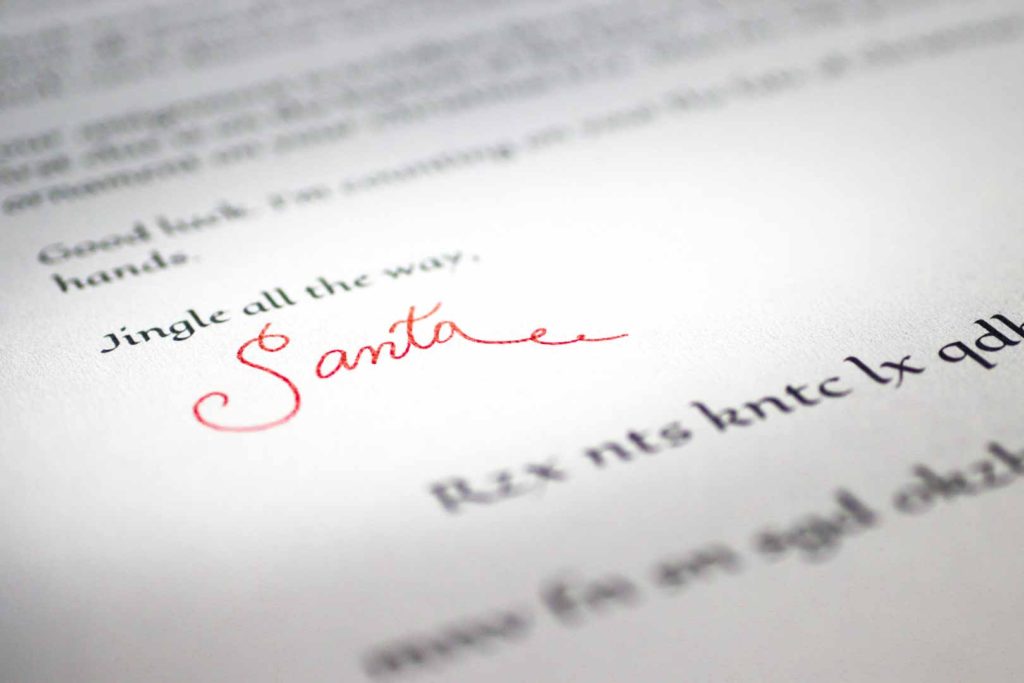
Clue No. 1: A Letter from Santa
The first step to this hunt is a letter from Santa. This establishes the story and gives the first clue. If you’re not feeling up for writing your own letter, go ahead and download mine (and this is without you giving up any sort of personal information. It really is free.)
You can print this on any sort of paper. I decided to go to Hobby Lobby (or any craft store that sells scrapbook paper) and print it on some fancy paper with a slight gold sheen (you know, to make it look more magical.)
I also wanted to have the letter in a fancy red envelope. And since they don’t usually sell fancy red envelopes without having to pay way too much online, I decided to make my own. While I was at Hobby Lobby, I picked up a couple of pieces of 12 x 12-inch red paper (I made sure I got extra just in case!).
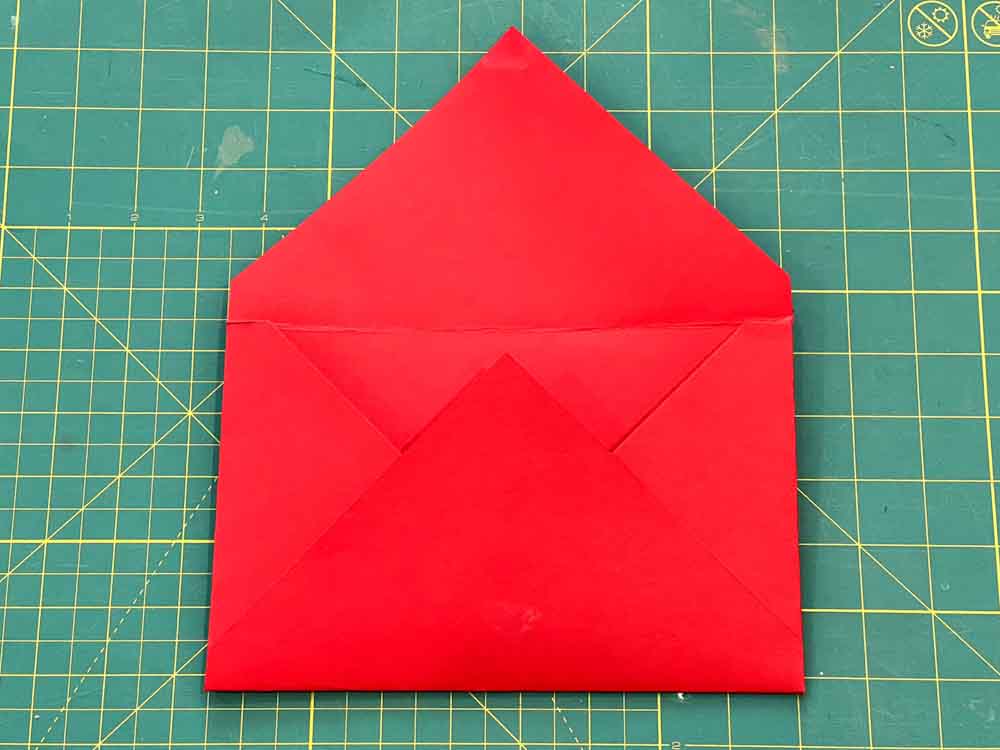
Here’s how I made my envelope (FYI, I didn’t have double-sided tape and used one of my kid’s glue sticks).
Caesar Cipher Clue:
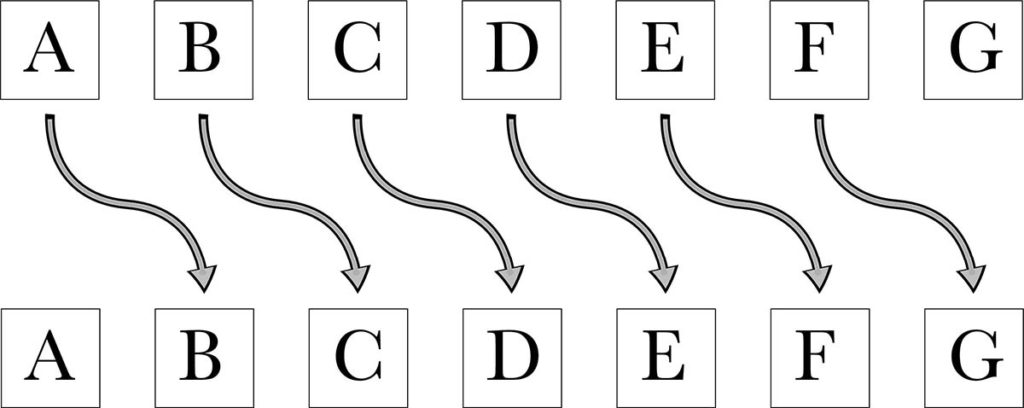
The first clue at the bottom of the letter is a classic Caesar Cipher (or ROT-x Cipher). This is a simple substitution cipher where you take the original message (plaintext) and substitute it with another letter of the alphabet (ciphertext).
With a Caesar Cipher, you do this by rotating (hence the ROT abbreviation) the alphabet over a predetermined number of shifts. So, for a ROT-1 shift, A becomes B, B becomes C, etc.
What’s great about this cipher is that it takes very little explanation to decode. All you need to do is hand your kids a cipher wheel and they can figure out how to decode it themselves. If you want to get more into what this cipher is, check out The Caesar Cipher (What it Is and How to Teach Your Kids).
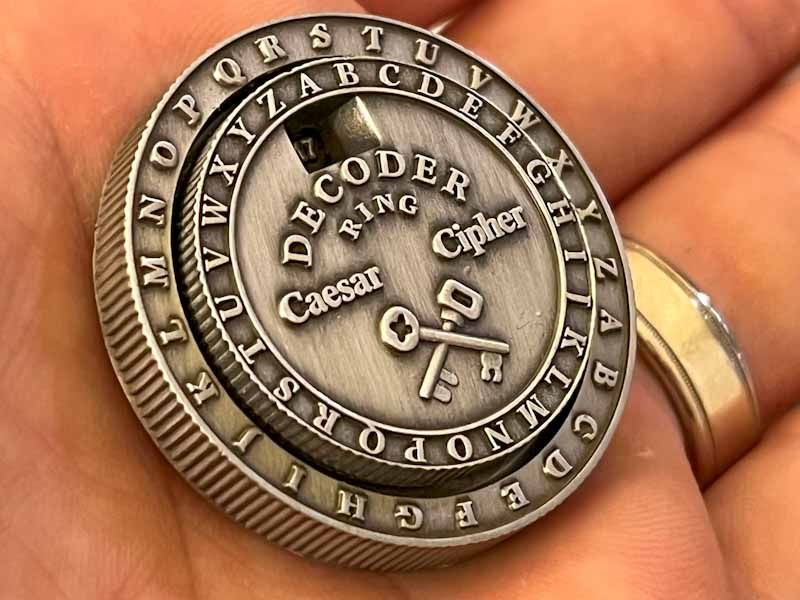
Caesar Cipher Decoder:
A cipher wheel is super easy to make. Below is a free download you can print, cut, and pin together with a brad fastener.
If you want to go the extra mile, age the paper and make it look like it wasn’t just pulled from the printer (find out how to weather paper using coffee or tea here).
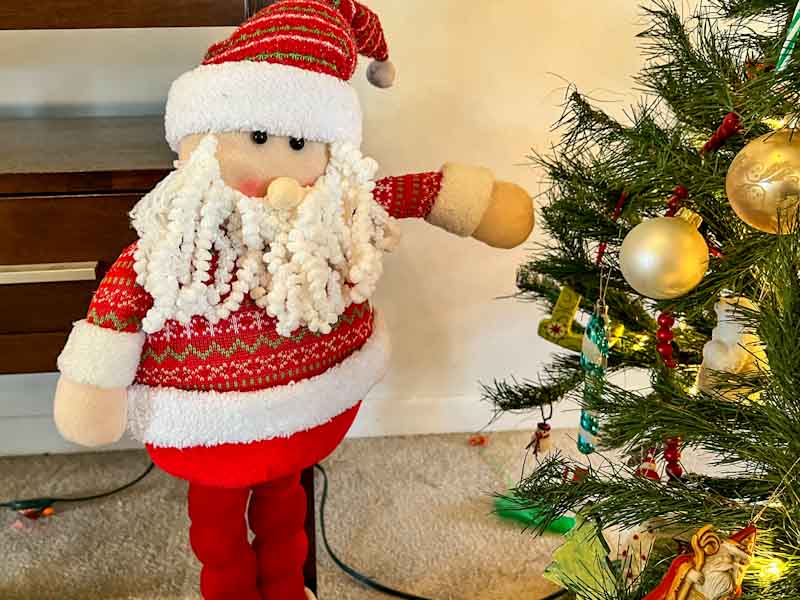
I decided to buy one that looks like a fancy medallion. It’s about $20 on Amazon, and when I hot glue some string to the back, it looks like a Christmas ornament. Which is great because Santa hung it on the tree for the kiddos to find.
I propped up the arm of one of our Santa decorations to point the way to the medallion. And since this guy has been hanging around the Christmas tree for weeks, he won’t give anything away until the kids read the letter.
The Code on Santa’s Letter:
So now we need to make the actual code on the bottom of Santa’s letter. It will lead to another message on the back of a Christmas puzzle, so I want to make this first clue point to the shelf with all our games and puzzles.
Here’s what we came up with:
Say out loud my reindeers’ names…
now go to the place with all the games.
If we encode that using a ROT-25 cipher (I went with a ROT-25 because Christmas is on the 25th), it looks like this:
Rzx nts kntc lx qdhmcddqr’ mzldr…
mnv fn sn sgd okzbd vhsg zkk sgd fzldr.
Of course, you can make your own clue. I recommend making sure you don’t give the destination away too early in the message. Otherwise, they may stop decoding halfway through and jump ahead to the next clue (remember, the whole point is for this to take up time!).
If you decide to make your own message, don’t worry, you don’t need to encode it yourself. Here’s a link to a great site that will do all your encoding for you (and yes, it’s free): https://cryptii.com/pipes/caesar-cipher
Make sure you include in the message what the rotation is to solve the puzzle. This could be a number in the corner of the page, or more simply, right after the coded message.
Where to hide Santa’s letter:
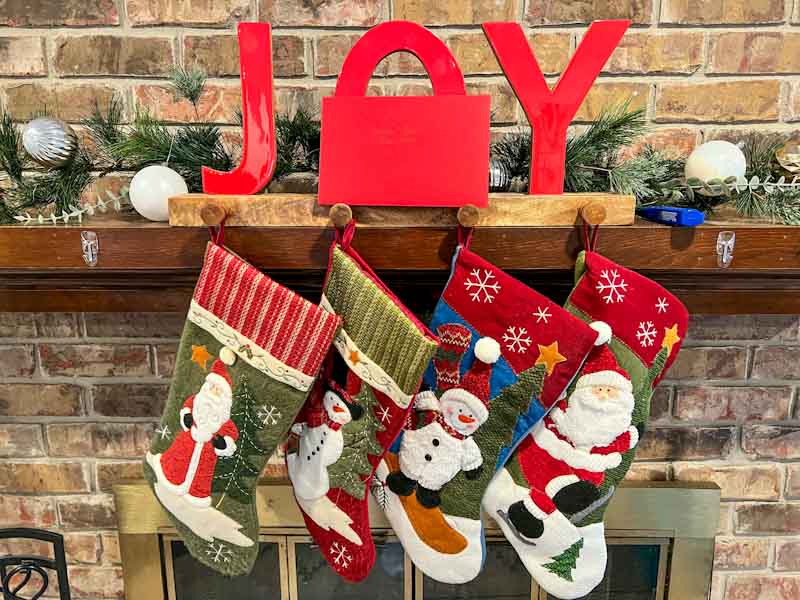
You can put the letter pretty much anywhere. Hanging from a stocking, outside (or inside) the cookie jar with some crumbs on the counter, or on the Christmas tree. We placed ours on the mantle above the stockings, and then we waited for one of the kids to notice it.
Clue No. 2: A Hidden Message on a Christmas Puzzle
When I was coming up with the idea for this treasure hunt, I wanted to have a variety of clues and activities for the kids to do. I didn’t want to stick with just one way of coding and decoding messages.
I decided to put the second clue on the back of a 100-piece Peanuts Christmas puzzle (the last time I checked, the puzzle was out of stock. If you have your heart set on a Peanuts Christmas puzzle, here’s a similar one by the same company). Since we had four kids involved, I separated the puzzle into four quadrants. This way, each kid had to solve a quarter of the puzzle before they could put it all together.
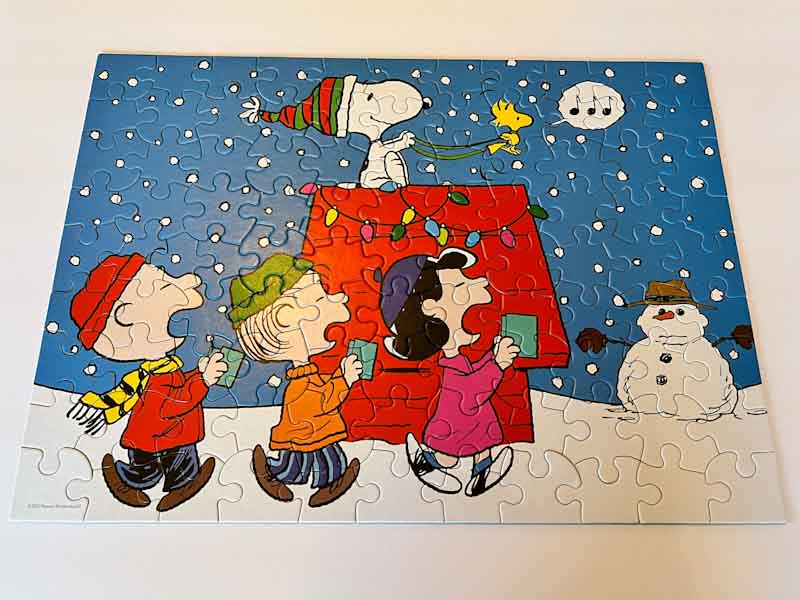
I recommend having a couple of sheets of Dollar Tree foam board or something flat on hand to use for flipping. It’s not nearly as much fun to solve a puzzle upside down. This way, once the kids solve a fun and festive Charlie Brown puzzle, they can flip it over to find the secret message.
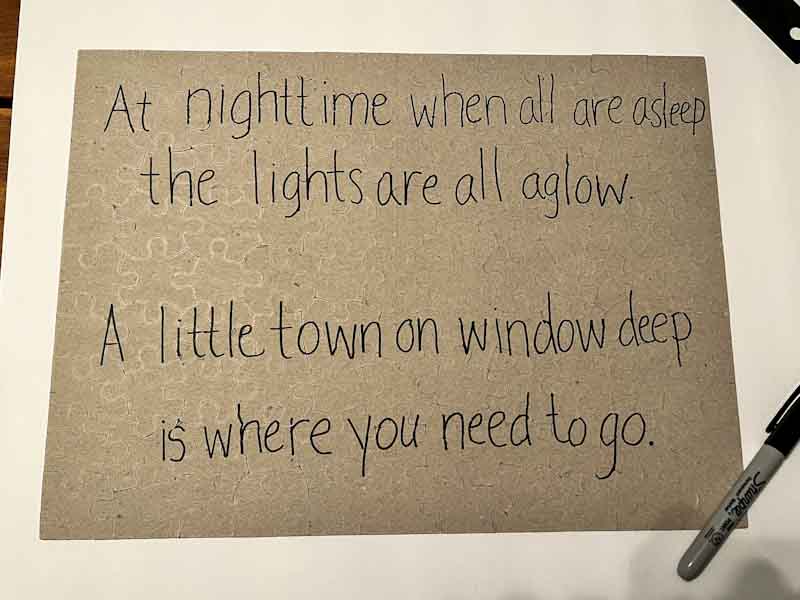
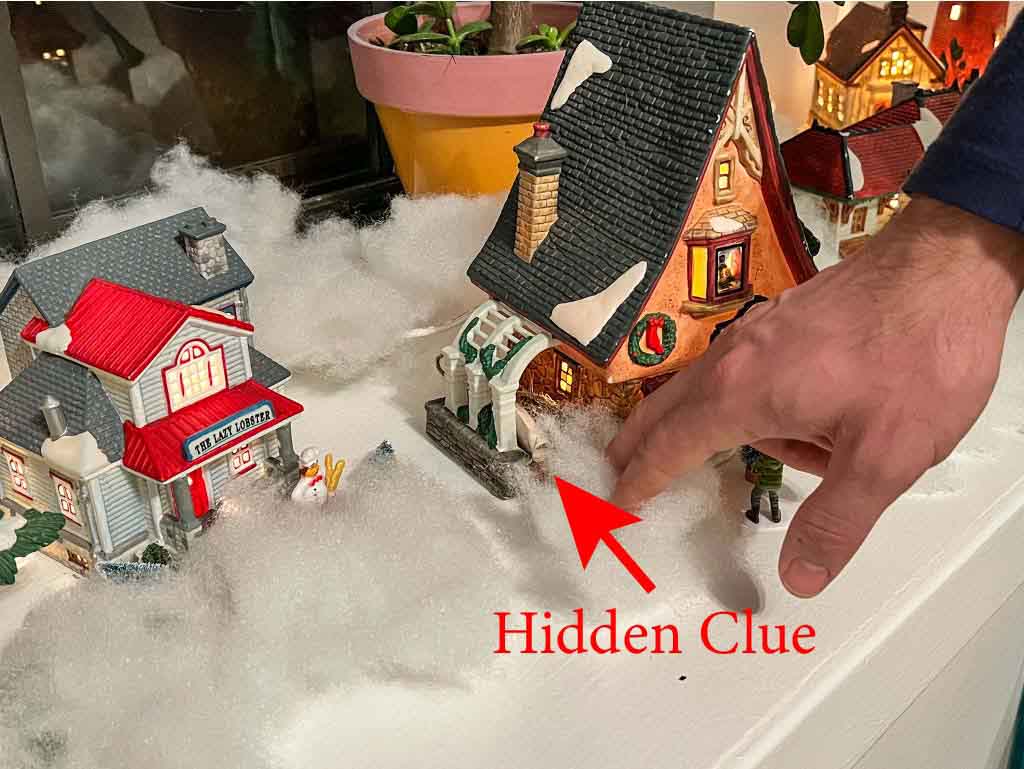
This message leads to the next clue, which I put in the Christmas village scene displayed in a window of our house. Here’s the message we put on the back of the puzzle:
At nighttime when all are asleep
The lights are all aglow.
A little town on window deep
Is where you need to go.
If you’re going to split up the puzzle for multiple kids to solve, I recommend spreading out the clue over most of the puzzle back. This way each kid gets to have a portion of the clue and nothing can be accidentally given away until the whole puzzle is assembled.
Clue No. 3: An Ottendorf Cipher Hidden in a Christmas Village
The third clue is a classic Ottendorf Cipher. If you have no idea what I’m talking about, this is the cipher on the back of the Declaration of Independence in the movie National Treasure. And while the name sounds weird, the code itself is super simple.
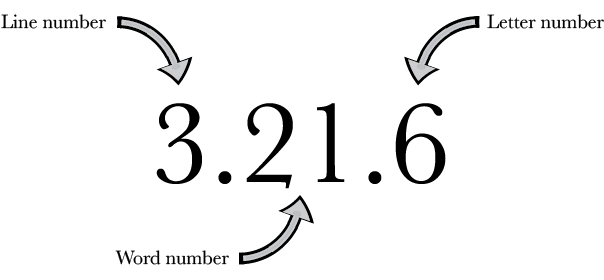
An Ottendorf Cipher is a simple substitution cipher in which each letter of an original text (plaintext) is replaced by three numbers (ciphertext). The numbers correlate to a location on a single-page document that serves as the key. The first number represents the line, the second number is the word on that line, and the last number is the letter from that word.
If you want to learn more about this cipher, check out The Ottendorf Cipher (What it Is and How to Teach Your Kids).
Santa’s Clue in the Village:
The fun part about this is that the kids have been holding the cipher key the whole time. The key for this clue is the original letter from Santa.
This cipher leads to the next clue, which will be in morse code on a string of garland on a little Christmas tree we have upstairs. Therefore, the Ottendorf clue plaintext is:
Upstairs tree garland
Whatever clue you decide to go with, I suggest you don’t make it too long. Decoding (and encoding) an Ottendorf cipher can get a little tedious. I recommend a message that’s around 20 characters long is good enough.
The ciphertext for this clue using the original Santa letter as the key looks like this:
5.1.3, 3.4.1, 6.1.3, 3.6.1, 1.1.3, 5.2.1, 9.1.2, 2.6.5
6.1.7, 7.7.2, 1.1.2, 6.2.2
3.9.1, 6.5.3, 9.3.8, 11.2.2, 15.4.2, 4.2.4, 1.1.1
Here’s a pdf of this clue along with clues 5 and 6:
Hiding Clue No. 3:
Print out the pdf with the three clues and cut them out. Just like before, I decided to weather the paper using coffee to look like old-timey parchment.
This coffee step is completely optional. If you want to learn more about how to weather paper to make it look old, check out my article here. If you are going to do this step, go ahead and weather clues 5 and 6 while you’re at it.
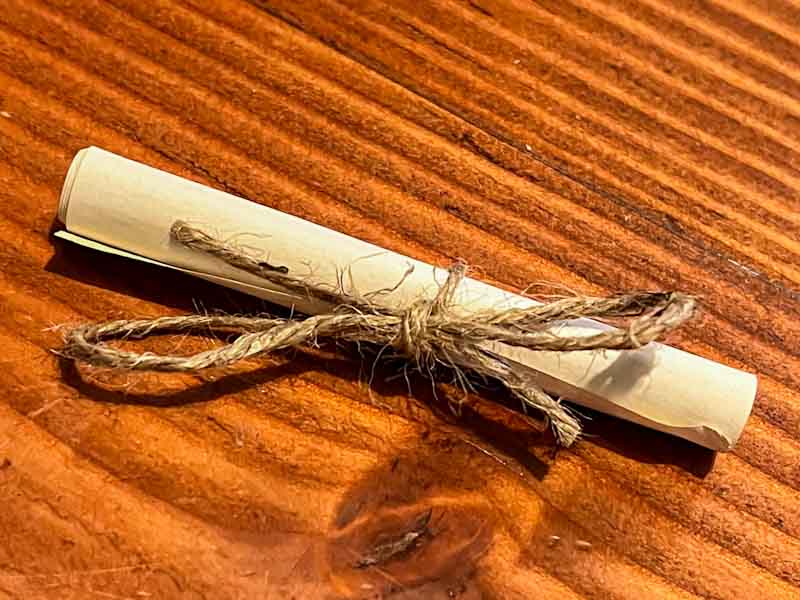
When you’re ready to hide the clue, roll it up, tie some ribbon or twine around it, and put it somewhere in the village scene.
Clue No. 4: Morse Code Garland
The fourth clue is encoded on a string of garland using morse code. The fun part of this clue is that it will look nice enough to leave on your tree. You can make this in advance and leave it up in plain sight.
This part of the treasure hunt has two components: a garland with morse code, and an ornament with a morse code decoder. Both are super simple to make.
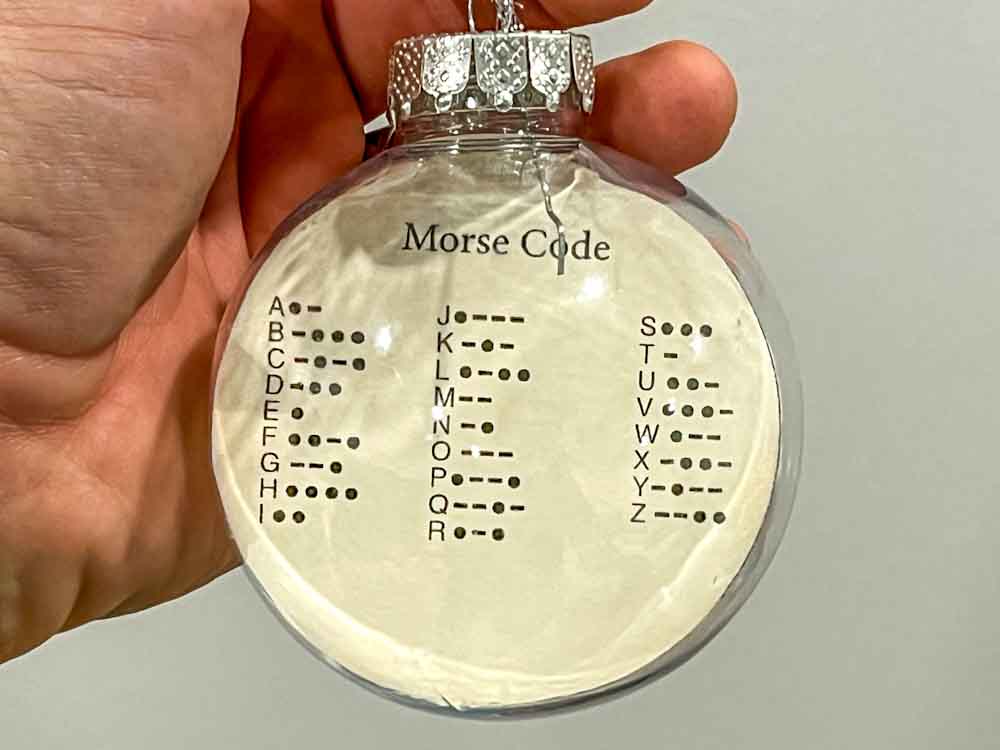
Morse code decoder ornament:
Chances are your kids aren’t fluent in morse code (or maybe they are and I’m the weird one…) and they’ll need a little help.
Start with a clear, fillable ornament. You can get a bunch on amazon (like this) or buy one the next time you’re at Walmart (which is what I did). I like something around 3 inches in diameter. It’s big enough to see the decoder we’re going to put inside.
Next, print out an image of Morse code. You can either do a quick Google search and download one of the many images available or just print out the pdf below. I have this one scaled to a 3-inch diameter.
Cut out the two circles and glue the backs together. This way you can see the decoder on both sides. Then roll up the paper and slide it into the ornament. You might need some tweezers to straighten out the paper.
Once it’s set, hang it up on the tree somewhere the kids won’t notice. When you set up the garland, make sure the ornament is close enough for them to discover it (you can even hook the ornament to the garland to make sure the kids discover it).
Making your Morse code message garland:
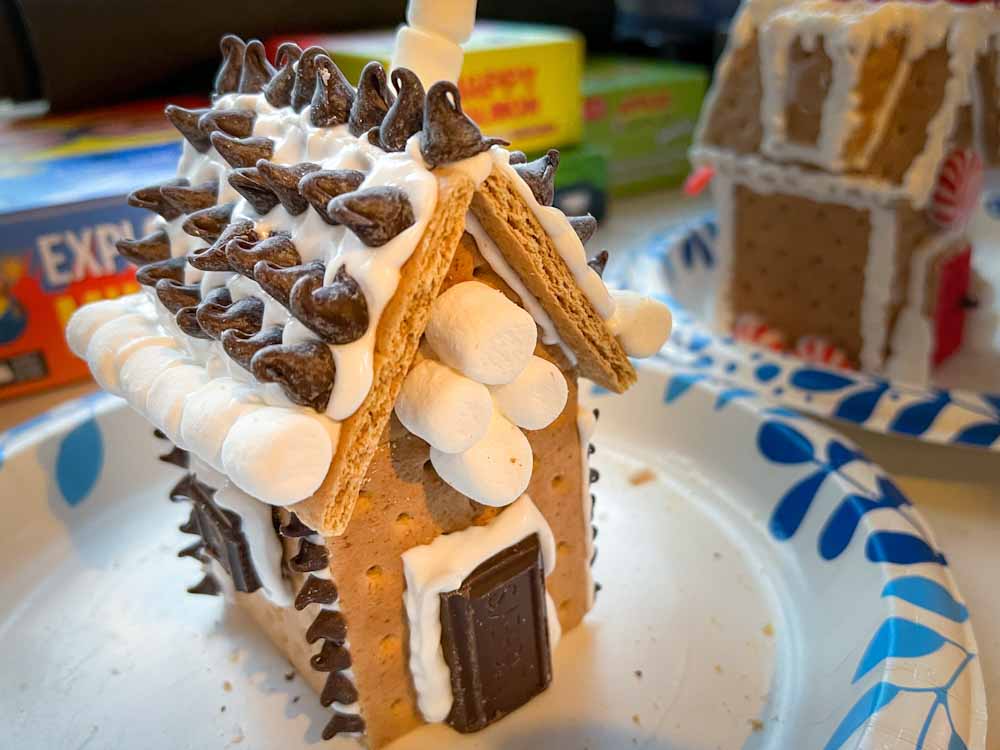
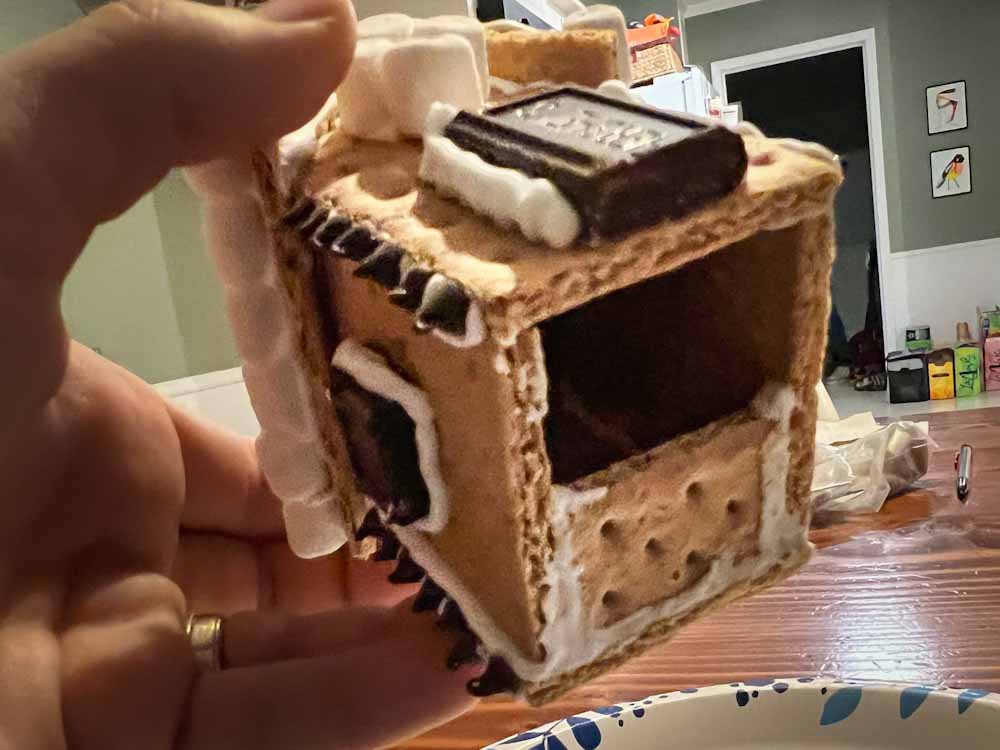
The garland message will lead to the fifth clue, which I hid inside a graham cracker gingerbread house. Earlier in the week, we all made graham cracker houses (instead of gingerbread houses. Much easier to make and way tastier to eat than the kits you can buy). I was sure to make mine a smores-themed house. It was all graham crackers, marshmallows, and chocolate.
The fifth clue will be hidden inside my house, so the morse code garland clue is:
House of smores
Which translates to morse code as:
…. — ..- … . / — ..-. / … — — .-. . …
I decided to keep the clue short and simple because I thought it might be too tedious if it was longer (like the Ottendorf cipher). It turns out morse code was much faster to decode than I expected. You can make this clue much longer if you like.
If you decide to make a different clue, here are a couple of tips. First, use a site like https://cryptii.com (this is the same site as the Caesar cipher translator) to generate your ciphertext.
Second, avoid using any punctuation. Any sort of online translator will include extra dots and dashes for all punctuation. A simple period “.” translates to “.-.-.-“. I learned this the hard way with “s’mores” which is why I now get rid of the apostrophe. Such is life…
How to make Morse code garland:
To make the garland, I started by counting how many dots and dashes there are in the ciphertext. I then bought the necessary amount of round (for dots) and oval beads (for dashes) at my local Hobby Lobby. I used 20-mm (about ¾ inch) round beads and 25-mm (about 1 inch) oval beads. The size isn’t super important. Just get something that looks like dots and dashes.
Here’s a mixed round/oval assorted pack I found on Amazon.
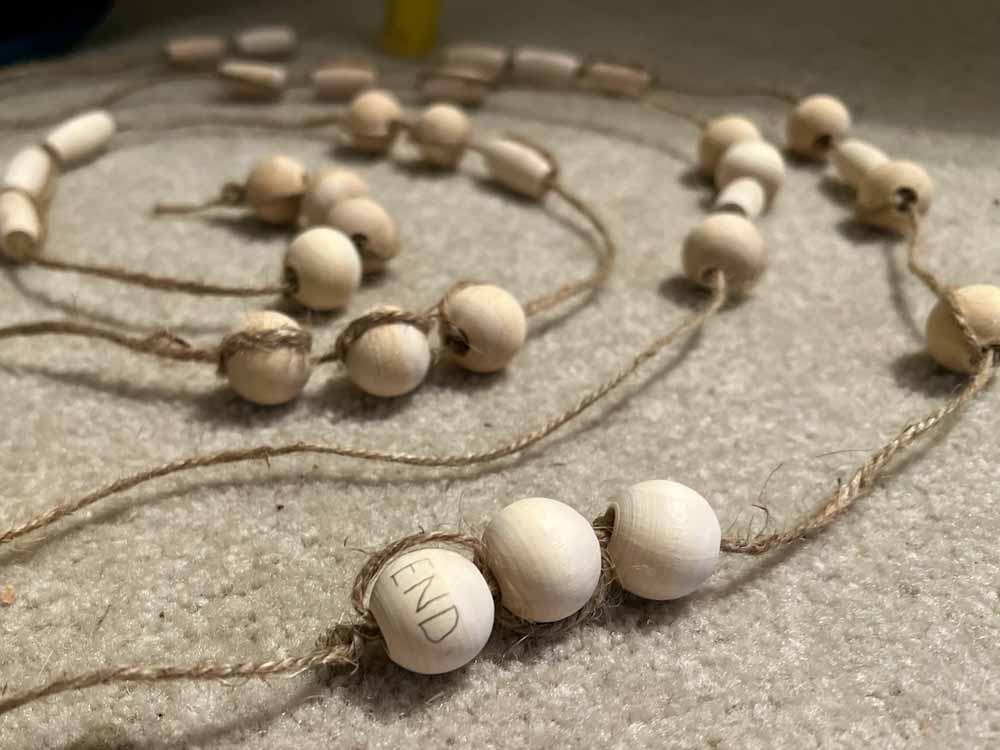
Next, cut a long piece of twine. This should be long enough to string up the whole message and then some. Tie a knot on one end of the twine (so nothing slides off).
To string up your message, insert the message one bead at a time and wrap a loop around the bead. You might need a large needle or piece of wire or something to help push the twine through the hole.
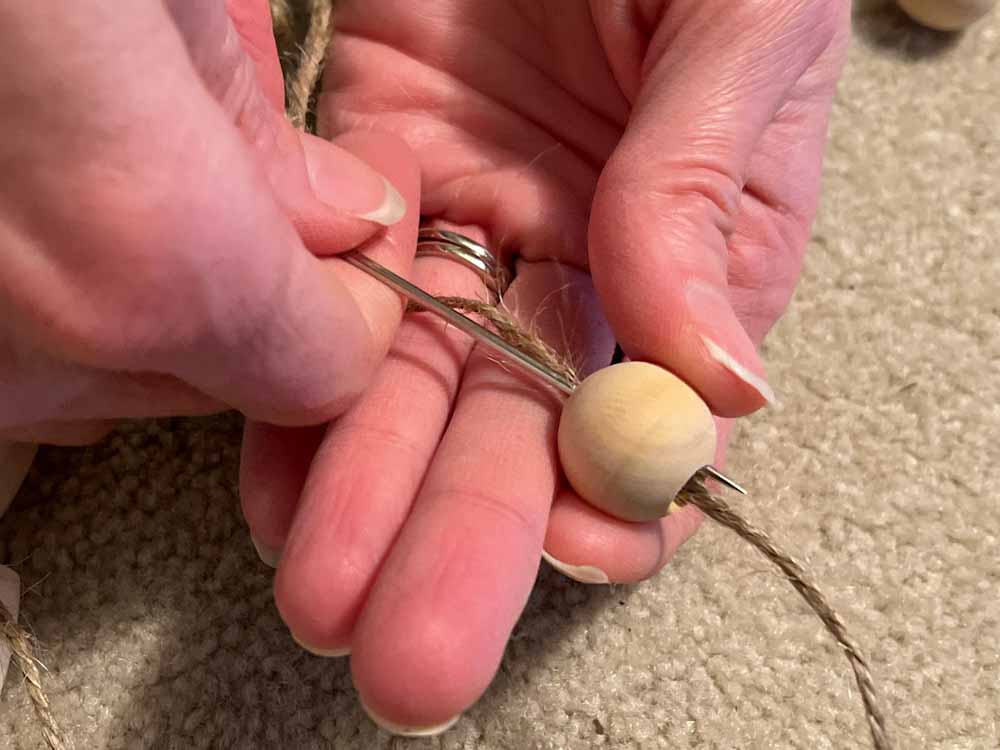
This should keep the beads in place without needing to knot everything. Each bead should look something like this:
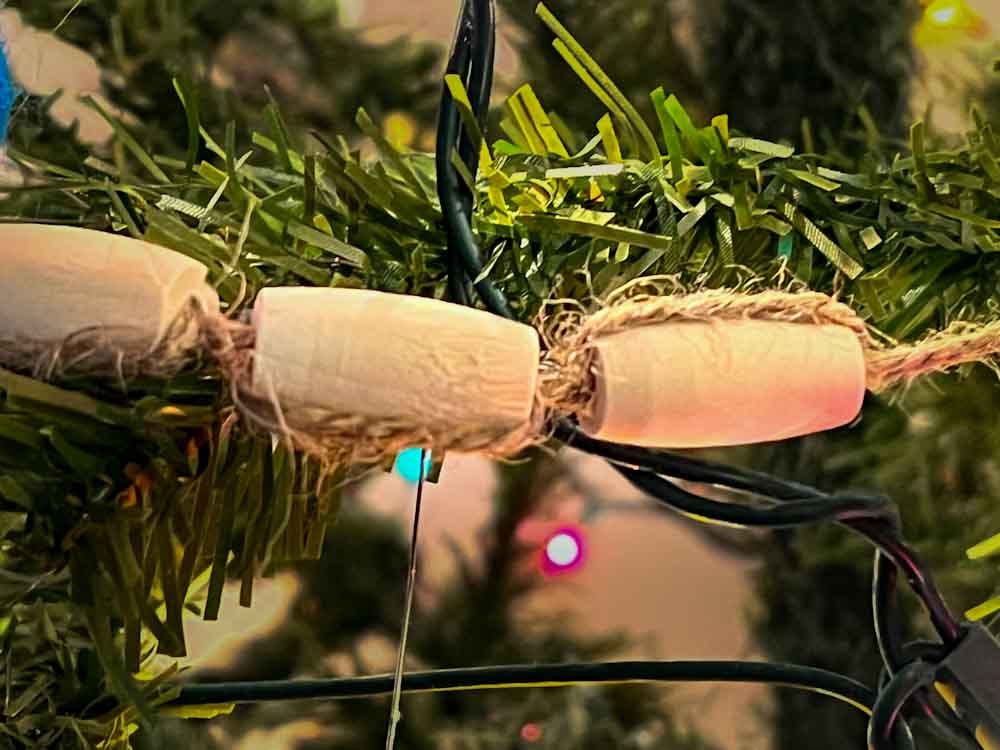
Put a larger space between each letter. To help them know where to start and end, we wrote “start” and “end” on the first and last beads with a Sharpie.
Clue No. 5: A Message in a Graham Cracker House
As I mentioned earlier, a couple days before the treasure hunt, we made graham cracker houses. I’m not going to get into how to make graham cracker houses (maybe in a future article). But I am going to say that it’s an activity worth doing and was super fun for both kiddos and adults.
Here’s a great video on how to make your own:
The video had you glue the house to a full graham cracker base. I skipped this step so I could put the clue in it. If you do manage to get organized early enough and make a message before building graham cracker houses, it would be fun to seal it in when no one is looking. This way they need to break the house open to find a clue. Not necessary, but it adds a bit of magic as they wonder how Santa managed to put a clue in there.
The clue inside the graham cracker house is going to be straightforward without any ciphers. I thought finding the clue would be enough fun.
Like the clue hidden in the village, this one was aged using some coffee, rolled up, and tied with twine.
I figured this is also a good time for the kids to have a break. Here’s what I put for the message:
It’s time for your cookie break! Go get one cookie each!
Clue No. 6: A Clue in the Cookies
Hidden under the small pile of cookies is another rolled-up clue. Like the previous clue, I decided to skip over the ciphers and give them a regular clue. Here’s what the clue said:
Now that you’ve had your snack, go find where the
reindeer keep their food on the Christmas tree. You’ll find
everything you need to unveil the secret message you’ve
had since the beginning.
Clue No. 7: Invisible Ink Revealer
The seventh clue is a secret message written on the back of Santa’s letter (kind of like the secret message on the back of the Declaration of Independence…). The kids were holding the final clue the whole time!
To write the message, we’re going to make some color-changing invisible ink using some leftover hand sanitizer (you can check out the whole article here). The invisible ink is made from a mixture of baking soda and water and then painted on the back of Santa’s letter. The revealer is a mix of turmeric and left-over hand sanitizer (preferably the runnier kind instead of the thick stuff) or rubbing alcohol.
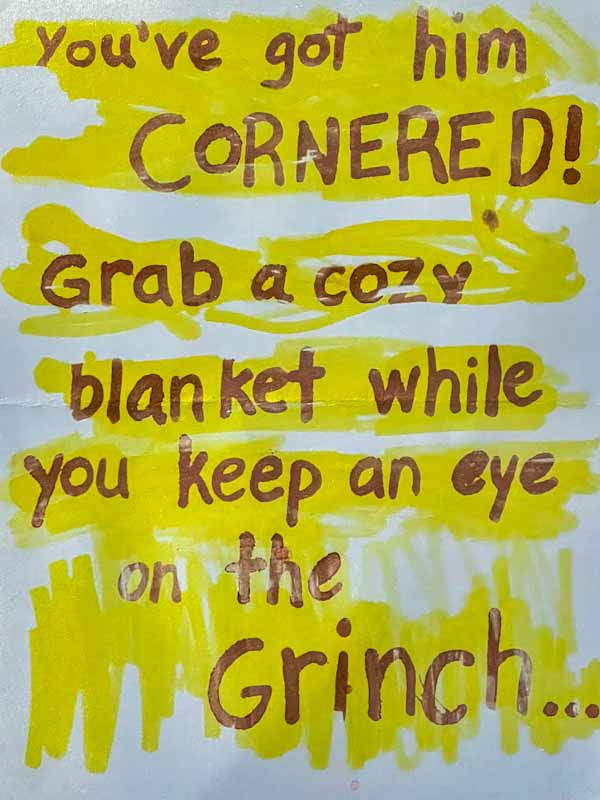
This is the final clue to the entire treasure hunt and leads to the final prize. Using a fine-tipped paintbrush, I carefully painted the following message on the back of Santa’s letter:
You’ve got him CORNERED!
Grab a cozy blanket while you keep an eye on the Grinch.
The first part of the previous clue points to the location of the invisible ink revealer. We have a “reindeer food” Christmas ornament my family won in a white elephant gift exchange. We also have a stuffed reindeer who likes to hang out by the reindeer food. I hung a couple of bottles of invisible ink revealer next to the reindeer food ornament.
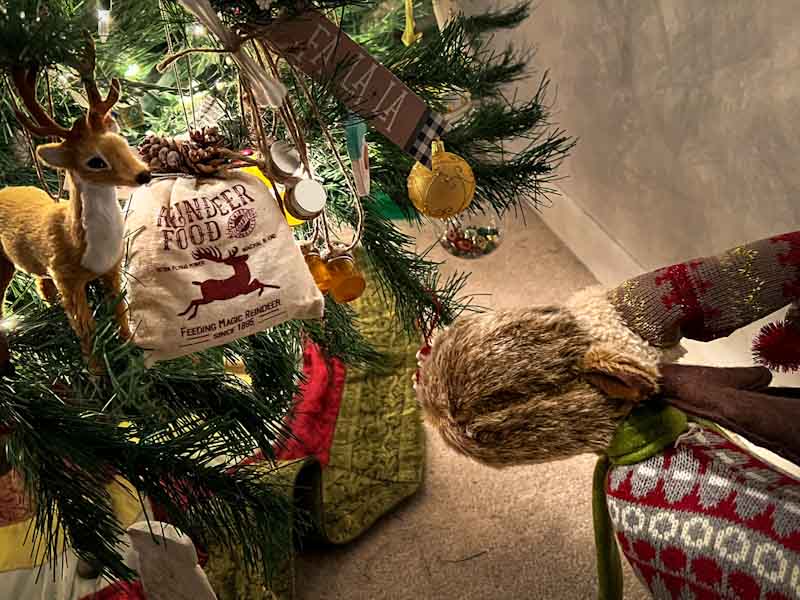
I found the little bottles at Dollar Tree. You can get something like this on Amazon that works just as well.
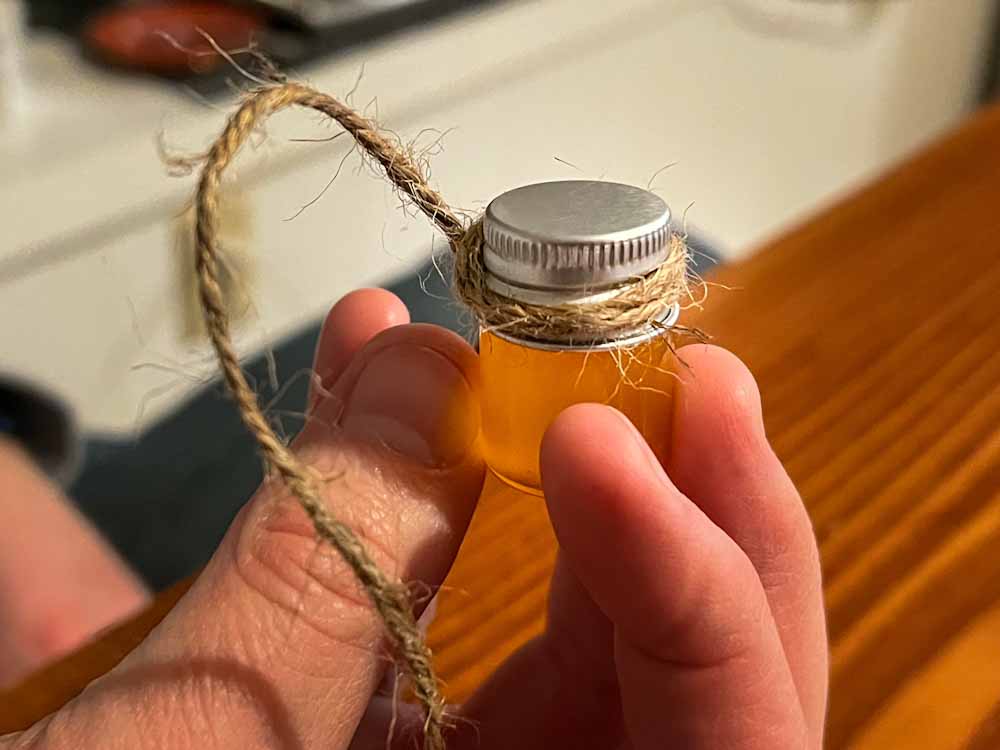
Fill the bottles with a mixture of hand sanitizer and turmeric. Tie some twine around the top of the bottle (I added a dab of hot glue to ensure nothing came off) and tie the other end to a couple of Q-tips.
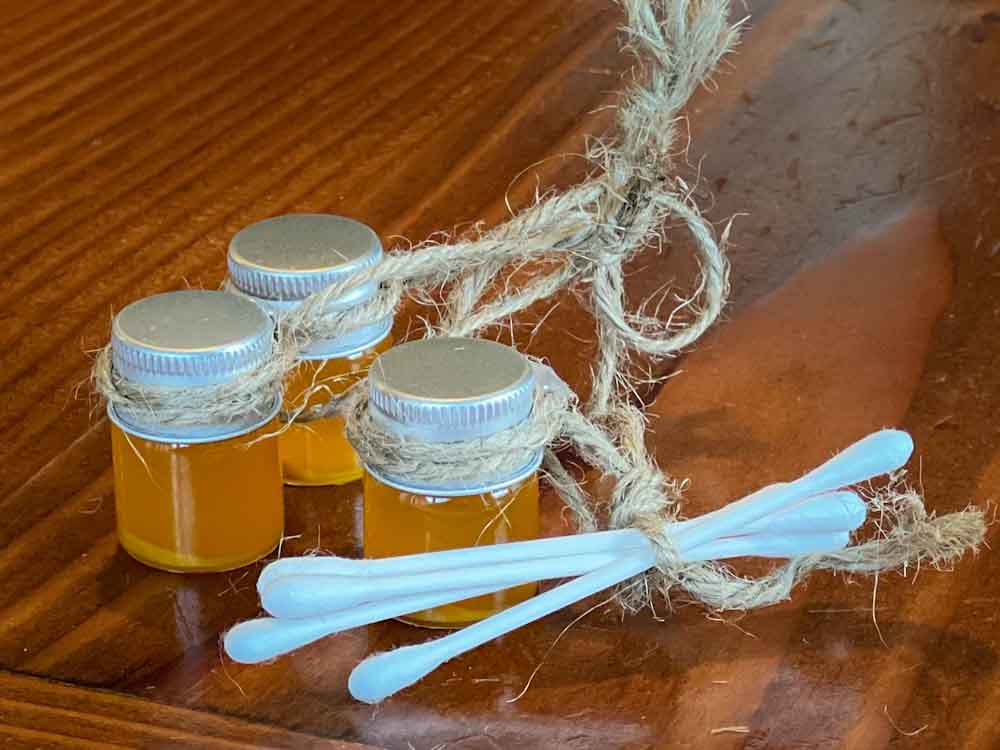
Dad Tip: Be careful with the turmeric solution. It stains. Have a sheet pan ready for your kiddos to decode on. You don’t want to stain your table. I also added a little tag to the jar with a note, “Careful! I stain!”
The Final Prize
When you rub the turmeric solution onto the back of Santa’s letter, a message appears in bright red, revealing the final clue:
The final prize is hidden in the living room under a basket full of blankets. Since Christmas was still a couple of days away, we wanted the kids to have something fun to open early. Each kid received a wrapped gift of new pajamas (we have a family tradition of new Christmas PJs every year).
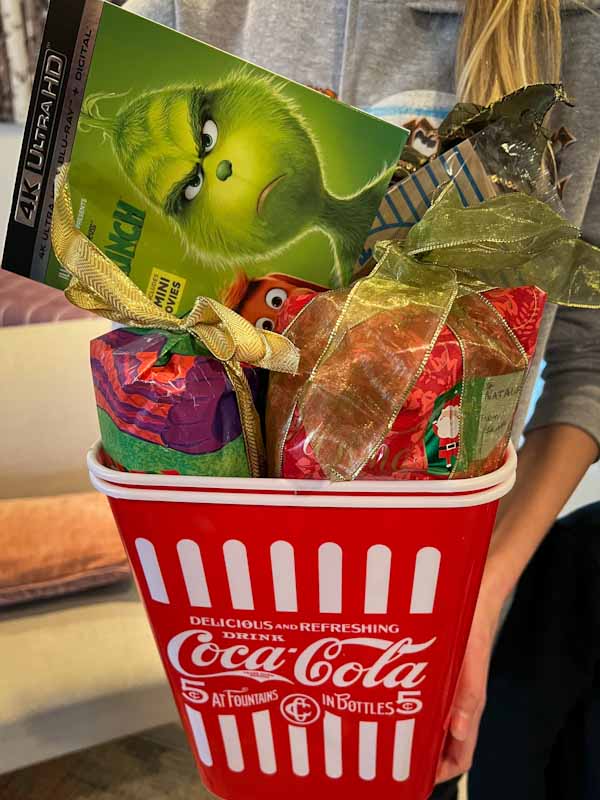
And since we knew all the kids love the 2018 movie “The Grinch” (I mean, who doesn’t like Benedict Cumberbatch?), we decided to have a cozy movie night as the final prize (Santa did ask in his letter to keep an eye on the Grinch after all). Just add some popcorn and hot chocolate and the prize is complete!
Final Thoughts
While this all seems like a lot of work, I promise it really isn’t. Making the clues takes a lot less time than it takes to write an article about how to make all the clues. Setting up the treasure hunt goes by pretty quickly, especially when you get all the adults involved.
This was the first time my extended family participated in one of my treasure hunts and the adults had as much fun creating the clues as the kids had solving them. Since all the adults had a hand in creating the clues, they had a blast following the kids around as they searched for and solved clues.
In the end, it turned out to be the best way for us all to spend the day before Christmas Eve. I think I might have started a new tradition!
Recent Posts
For anyone new to Dad Stuff, you should know that I’m a big fan of making treasure hunts for my kids. I love to create an epic story where they have to solve clues and ciphers to discover a special...
My kids have big imaginations. I mean, who hasn’t dreamed of sending secret messages like a spy or decoding a secret pirate map? If I'm honest, I have dreamt about living out my own personal...